
Purpose
Sensors are an important part in train automation, because they provide information that a train has reached a certain position on the layout. When reaching a sensor, the automation software is triggered to do different things depending on the specific situation, e.g. stopping the train, allocating a block ahead, releasing the last block, and many other things.
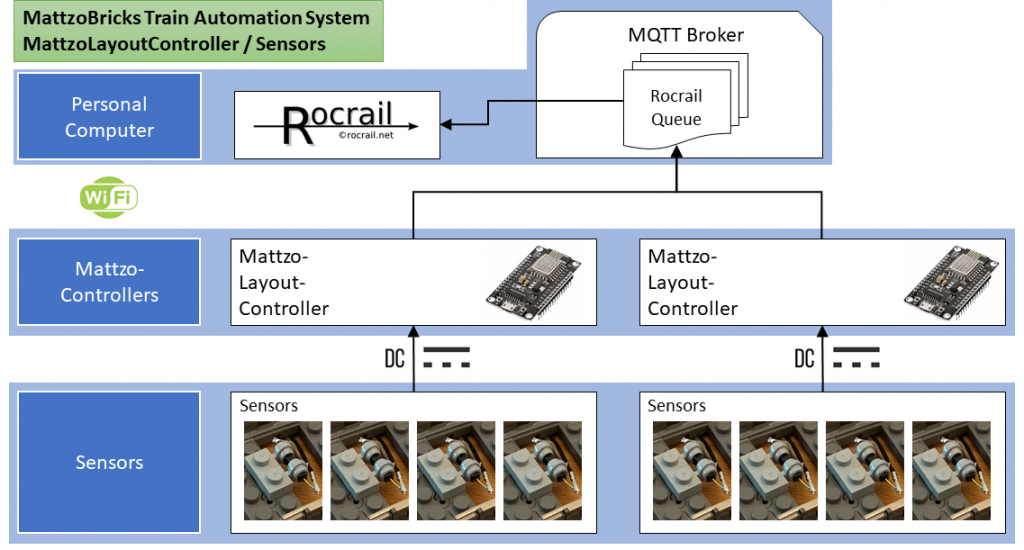
The following diagram show how sensors are embedded in the system architecture of the MattzoBricks Train Automation System:
Technology
Traditionally, 3rd party vendors have supplied sensors for the LEGO train system based on infrared technology. Infrared technology has a couple of severe drawbacks:
- Infrared sensors are heavily subject to the light situation and other environmental influences.
- Infrared sensors have severe problems of detecting dark vehicles with complicated, stealth-like shapes – especially steam locomotives.
- Infrared sensors are ugly and comsume a lot of space on the layout.
- Infrared sensors are difficult to install in curves.
- Infrared sensors are based on optical, analogue technology, with conceptually make it significantly harder and more complex to capture the event of a passing train with sufficient reliability.
To overcome these problems, we have built new sensors that are based on a completely different technology: reed sensors!
Reed sensors have the following advantages over infrared sensors:
- 100% reliable.
- Respond immediately.
- Independent of light situation and environmental influences.
- Can be built into curved without a problem.
- Small footprint on the layout – can even be installed invisibly.
- Work digital and require less costly controllers.
- Cheap to build.
Media
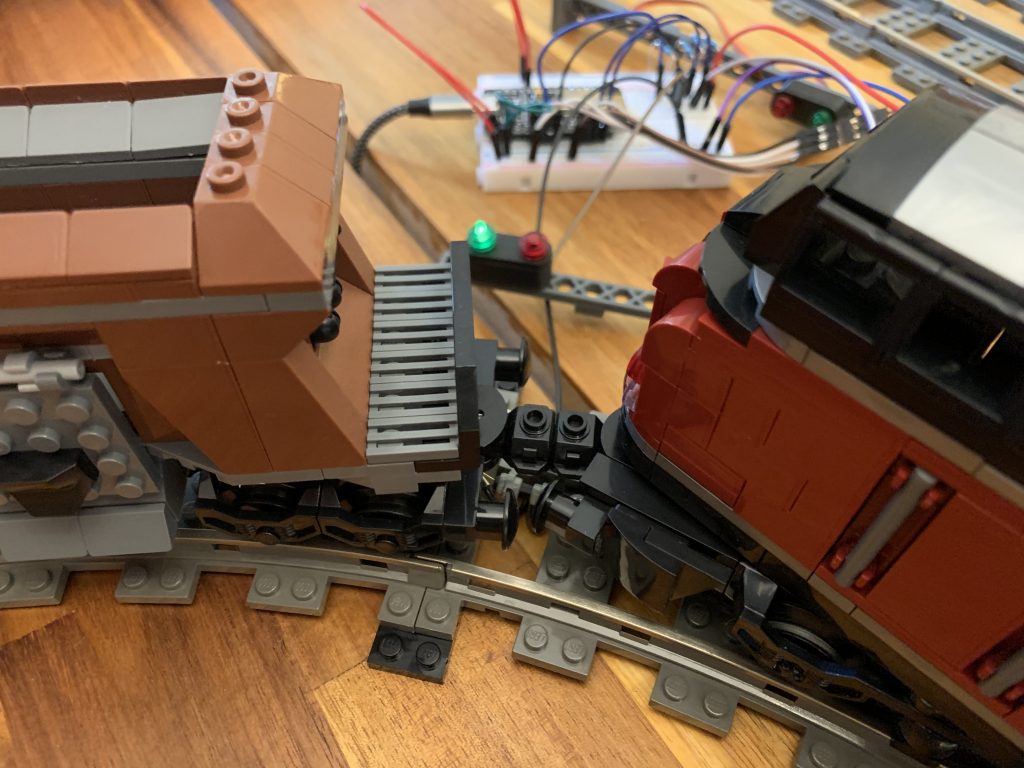
Check out our video on sensors:
In the video, we explain the design of the sensors and go for a testride with the V200 diesel engine and the Emerald Express.
Implementing the magnets into the trains as shown in the video is supposed to be the best and most reliable version of triggering the reed sensor. Anyway, there is also another solution, which is triggering the sensors with the couplings of the vehicles. This is a bit tricky, because you need to turn the reed sensor by 90°, and it does not work as reliable as the neodyme magnet option shown in the video.
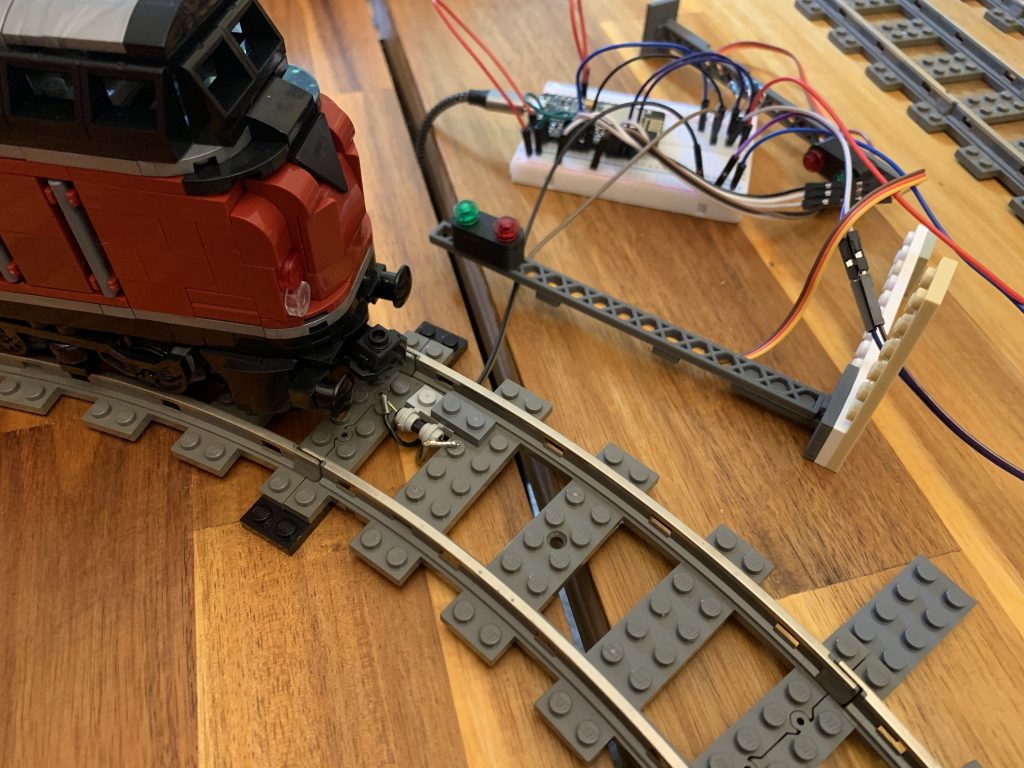
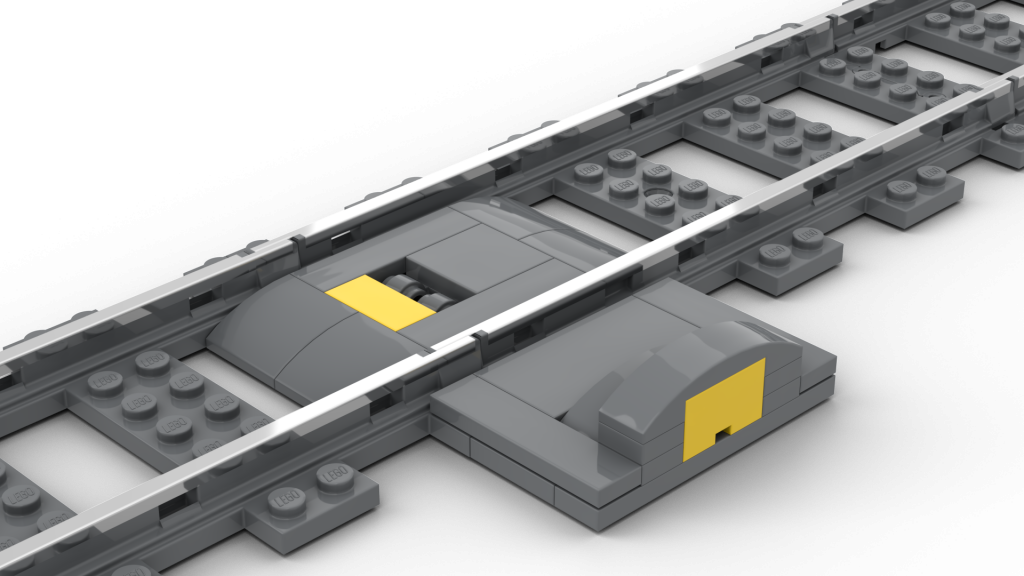
The reed sensor is turned vertically by 90° and must be placed in curves a bit on the outer side of the curve. This is because the couplings of longer vehicles swivel out to the outer side in sharp curves, and are no longer precisely overhead the middle of the track. Nevertheless, a single coupling alone does not trigger the sensor yet (see following picture). The reason is not the strength of the magnetic field, but the lack of defined orientation of the magnetic field. This is because the magnet turns freely inside the holder if uncoupled.
This change when you attach a 10mm neodyme magnet on the coupling. The magnet strengthens the magnet field of the coupling magnet and aligns it correctly, so that the reed sensors is triggered.
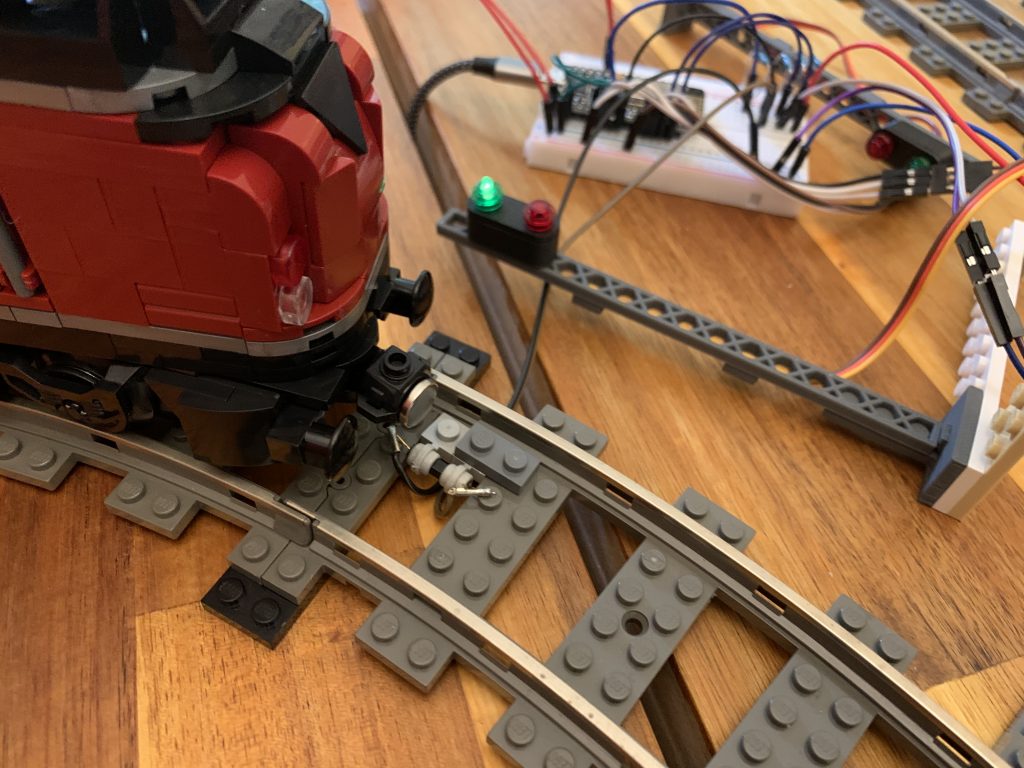
This even works when the coupling is turned away from the centerline of the track.
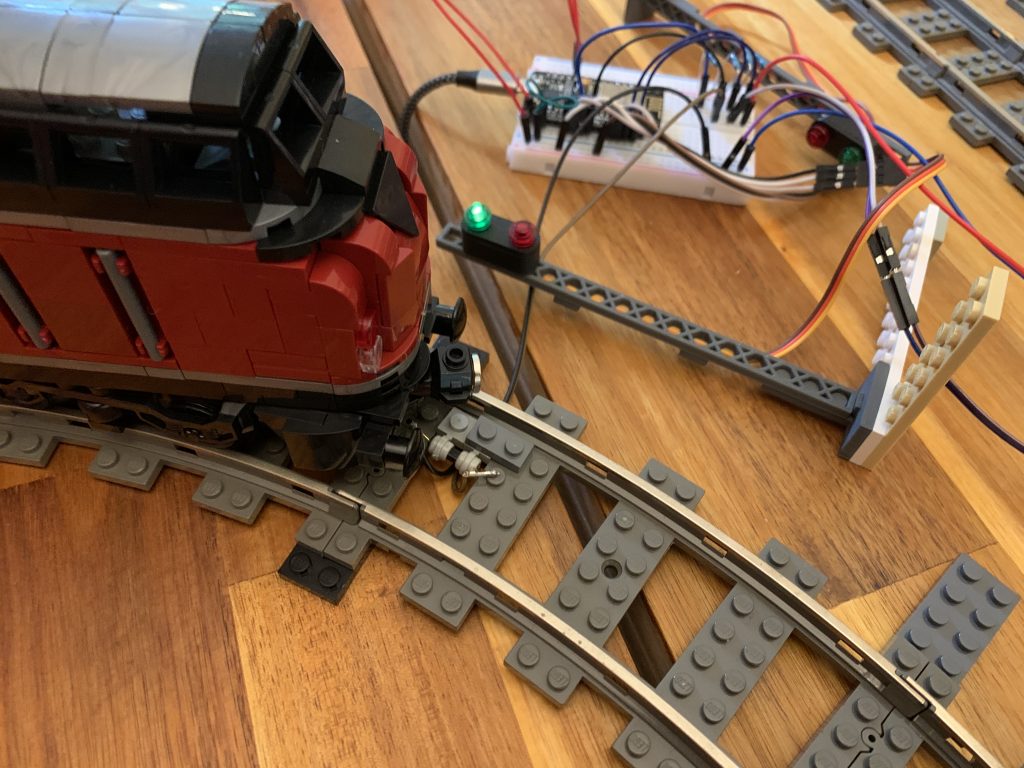
Joint couplings trigger the reed sensor without additional neodyme magnet. Their magnetic fields are supporting each other, and the direction of the magnetic is correctly aligned as required for triggered the reed sensor.
The couplings option is in total a bit shaky, and, if at all, only advisable for small layouts. Without additional magnets, the reed sensor will be triggered not until the rear of the loco and front of the first waggon – the first joint pair of couplings pass the sensor.
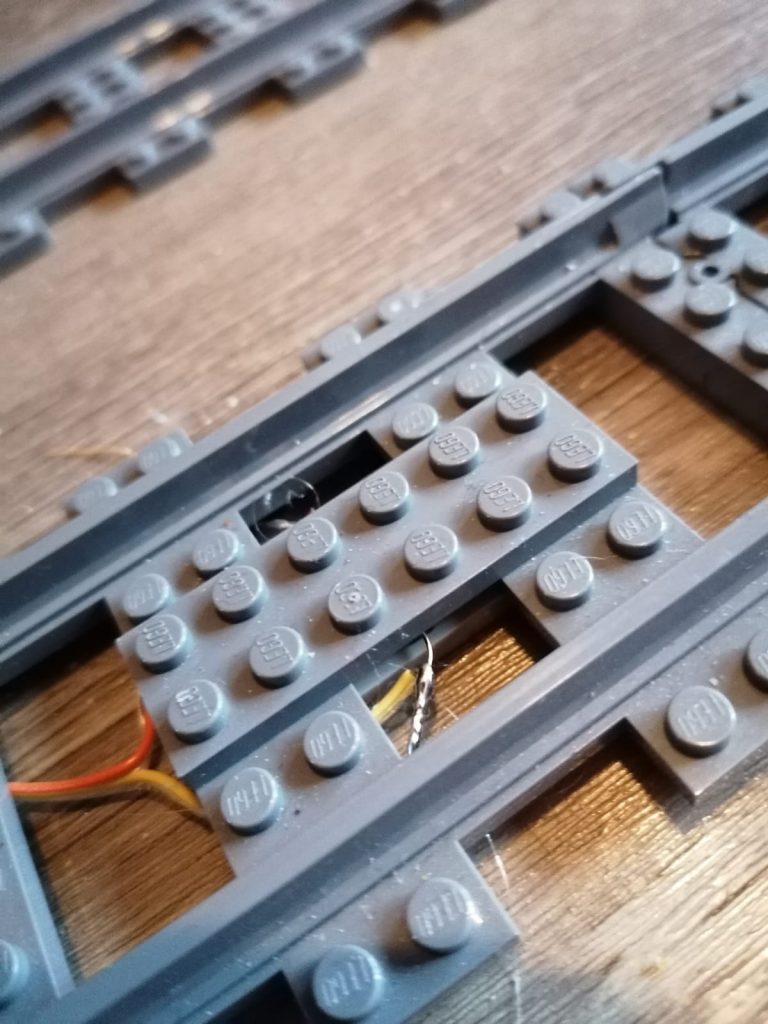
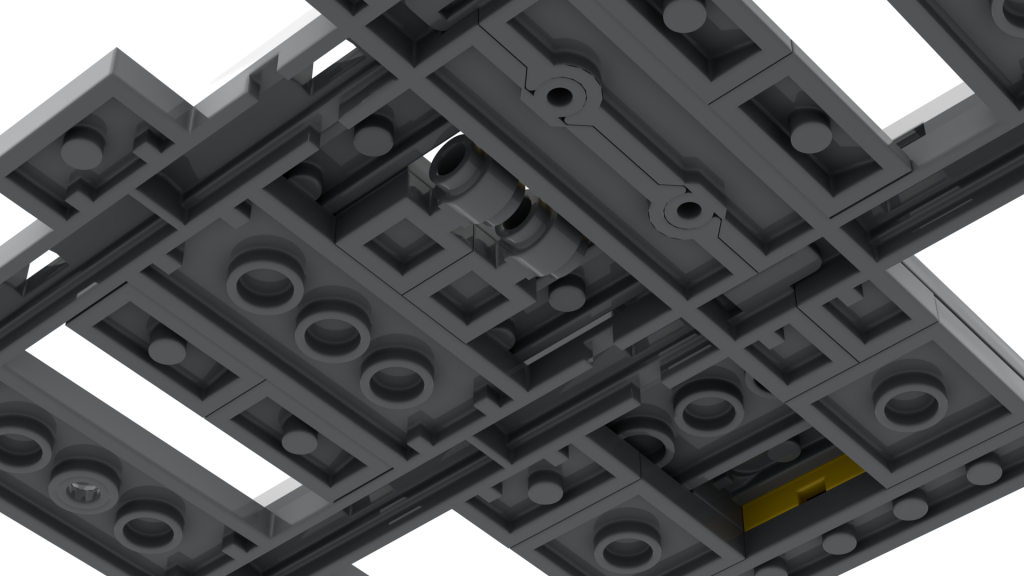
In addition to the video, there is another way of fixing the reed sensors on the track as shown on this picture (thanks to Henk):
In the following video, the couplings magnet option can be seen in real life:
When operating larger layouts with 20, 30 different trains, of which 10 run concurrently, you will also opt for maximum operational security, and choose the more reliable option shown in the video.
One more thing regarding train motors: a train motor will only trigger a reed sensor if it actively operates, i.e. if current is going through the motor. Only then the magnetic field in the motor is strong enough to trigger the sensor. This should usually be no problem, but when you exhibit your layout on Brickworld, you don’t want to take any risks.
Building Sensors
If you want to build the sensors yourself, you need reed sensors type GPS-14A, size 2,5x14mm.
The neodyme magnets shown in the video have a diameter of 5mm, height 3mm. You use other magnets if that fits your situation better. Something it is necessary to place two or more magnets in a row, which enlarges and strengthens their magnetic field. If in doubt, better use a magnet too much than too few.
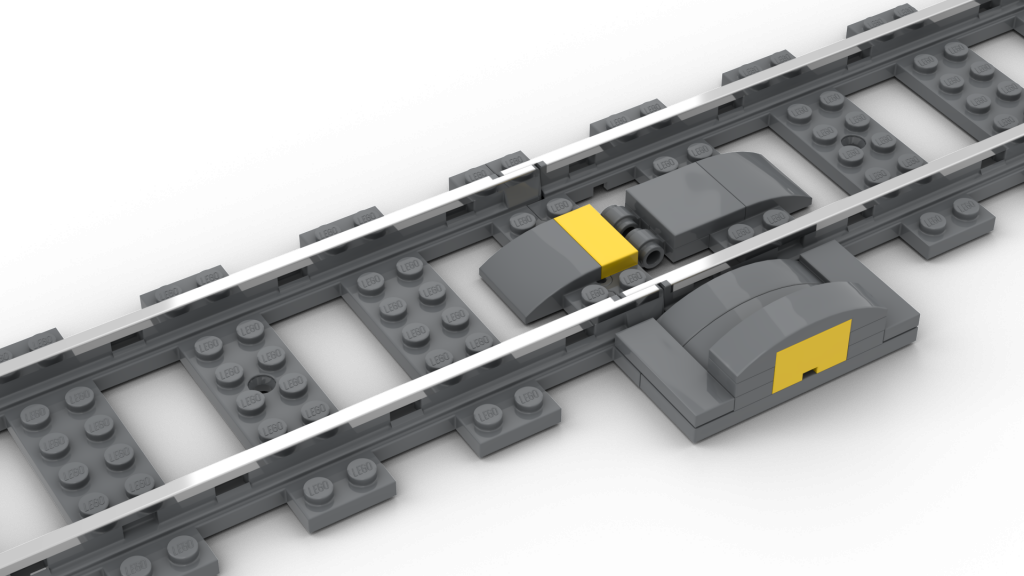
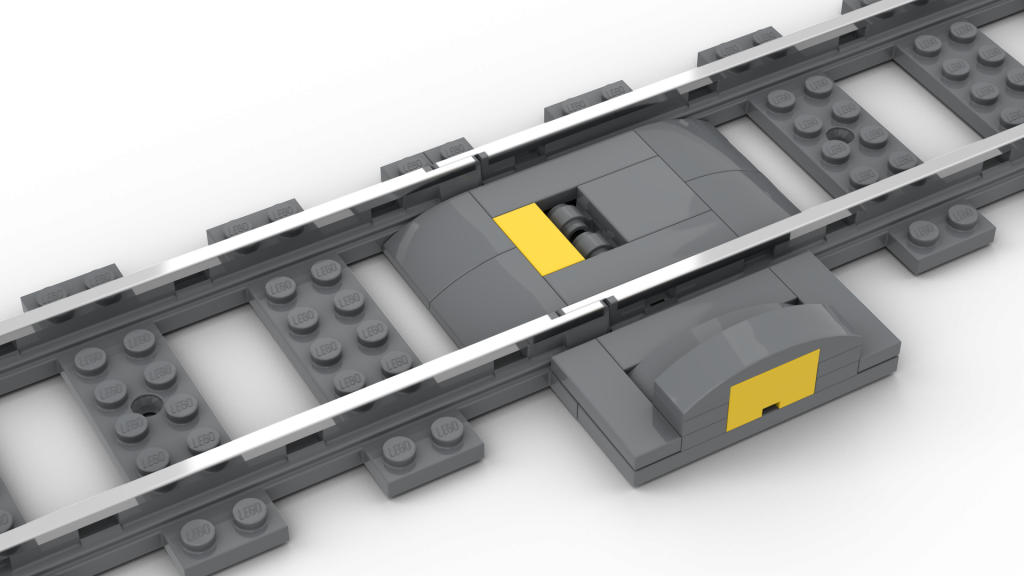
How you integrate the sensors into your tracks it of course purely up to you. The LEGO train system gives you a lot of freedom.
Here are some examples of how to integrate sensors nicely into your tracks:


Controlling Sensors
To control the reed sensors, you need a MattzoLayoutController. Check out this page to find out how to build it!
Sensor Types
In the MattzoBricks Train Automation System 2.0, there are different physical and logical sensor types. The following sections give an overview about these types.
Local Sensors
The sensors described above exist in the real world, and they are directly connected to the MattzoController. They are called Local Sensors.
Remote Sensors
Remote sensors are connected to one MattzoController, but their sensor event is relevant for another MattzoController. They are used for level crossings in autonomous mode. In autonomous mode, the inbound sensors may be positioned in a relatively large distance from the Level Crossing. In those cases it may be useful to save the long cables and use a remote sensor instead.
If a remote sensor is defined in a MattzoLevelCrossingController, there must be a corresponding local sensor in a MattzoLayoutController.
Virtual Sensors
Virtual sensors do not exist in the physical world. They are pure software sensors. Virtual sensors are triggered upon certain events in a MattzoController that are relevant for Rocrail.
There are the following variants:
- Virtual Sensors for Switches
- In Rocrail, feedback sensors can be configured for switches. Rocrail will clear a route for a train only, if the feedback event for the switch was successfully received. The MattzoLayoutController sends this feedback event after it has received the switch command and the switch was flipped.
- Virtual Sensors for Level Crossings
- In Rocrail, level crossings can be configured with feedback sensors. The feedback sensors indicate that the level crossing is fully closed or opened. Only if the booms are closed completely, a train will be released over the level crossing. This is important for trains that wait just ahead of the level crossing, and would otherwise enter the crossing before the booms are closed.
- Virtual Sensors for Bascule Bridges or other movable bridges
- Bascule bridges definitely profit the most from virtual sensors. With virtual sensors, you can make sure that trains enter the bridge only if it is fully closed. Otherwise, a severe crash with a train going over an open bascule bridge would only be a matter of time.
Super Artikel und ich stimme dir zu, bei dem Aufwand den man hier betreibt sollte man nicht an den Magnete sparen und die die Zuverlässigkeit des Systems gefährden.
Ggf. kannst du den Artikel ja noch um ein Bild vom Schaltplan und eine Erläuterung, wie das Sensorsignal an Rocrail weitergeleitet wird, erweitern (oder kommt das später noch in einem Extra-Artikel?)
Weitere Infos dazu sind in Planung.
Es gibt noch die omnipolaren Hallsensoren bei welchen die Richtung der Magneten keine Rolle spielt. Da ja auch der Reedkontakt einen Neodym Magneten benötigt, ginge dies auch für den Hallsensor.
Stimmt, aber leider sind die auch entsprechend teuer. Da wir fast 100 Sensoren benötigen, ist die Lösung mit den Reed-Schaltern aus unserer Sicht besser. Zu Hall-Sensoren werde ich aber vielleicht auch noch mal etwas bringen.
Do you think these sensor could be used to trigger a adafruits sound board?
If the sound board has a digital input port: yes!
I’d like to suggest adding amazon affiliate links for the equipment your are using. I would like to start playing around with this, but I have very little experience with micro controllers. Affiliate links would help lower the barrier to entry because i know I’m at least buying the right equipment.
Hi Andrew,
sounds like a good idea. I hesitated at first, because I wanted to keep the project private and didn’t want to give it a commercial touch. But I believe you are right, it might help in the end.
When I have more time, I could shoot a video showing how to wire and solder the controller. Would you be interested in that as well?
Cheers,
Mattze
That’s a great idea too!
Hello Mattze,
I’m starting to build your excellent solution for automation, and have several esp8266’s at my desk now to start working with. What are the lego 1×2 plates you are using to keep the reed sensors on the tracking, do you have a part number? I can’t find it on bricklink.
Thanks for your impressive work.
Hi Henk,
thanks! The part is a “Plate, Modified 1 x 1 with Light Attachment”. Both thick and thin ring should do. I believe that the thick ring is more stable.
Here is the link to the part: https://www.bricklink.com/v2/catalog/catalogitem.page?P=4081b&idColor=85#T=S&C=85&O={%22color%22:85,%22iconly%22:0}
Cheers,
Mattze
These magnetic seems to work much better than infrared. Can you share details on how you to program a controller and how to configure Rocrail, so we can use them as well? Thanks in advance!
Hello Mattze!
First of all I would like to thank you for the awesome technology, development, information and videos! To make a long story short I completely taken by the modern Lego and especially with the Lego trains and availability of complex switches (Tribrix) etc. Currently, I am learning Rocrail and in a few days I will receive a couple of ESP-WROOM-32 from Amazon (HiLetgo ESP-WROOM-32 ESP32 ESP-32S). One will be for the MTC4PU and the other on for the sensors. I have also ordered the 41632 1×1 plates for the reed sensors but I am not sure about which reed sensors to get. Will the “Gebildet 10pcs Plastic Reed Switch Reed Contact Normally Open (N/O) Magnetic Induction Switch (3mm×14mm)” I found in Amazon work?
Many Thanks!
Nikos
I recommend to order reed sensors of type “GPS-14A, size 2,5x14mm”. A look on the wbesite of Ali Express should help you.
Please note that you need an ESP-8266 / ESP-12 for the sensor controller. Using an ESP-32 as a sensor controller might work, but presumably you would need to do firmware code changes, and need to figure out the features of the i/o pins of the ESP-32 in terms of pull-up / pull-down functionality. So it might be easier to use an ESP-8266 from the beginning.