
Hello LEGO treinfans!
On this page, you find information about:
- building a Dutch railway signal with LEGO bricks,
- equipping the it with lights,
- automating the signal with a MattzoLayoutController.
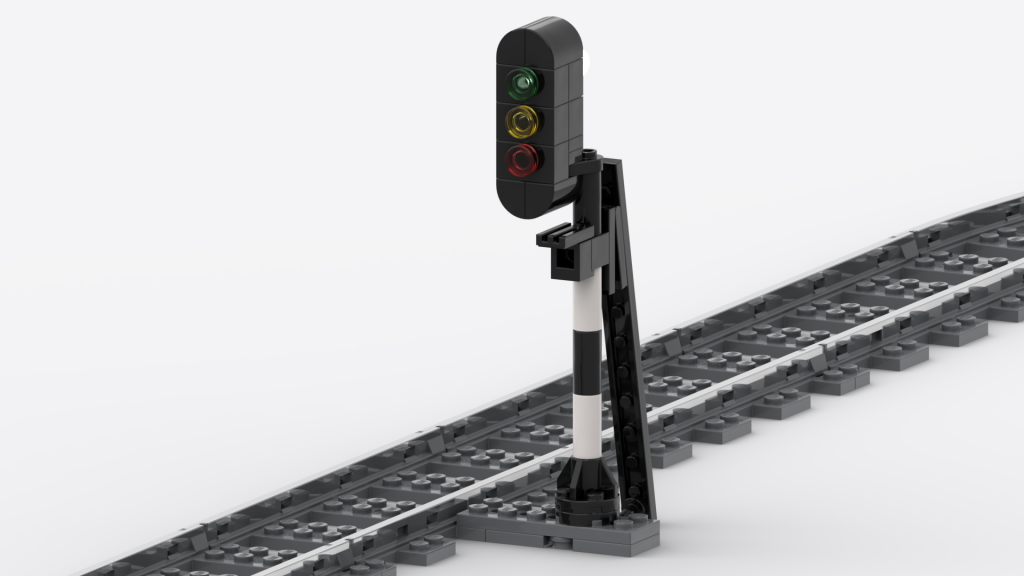
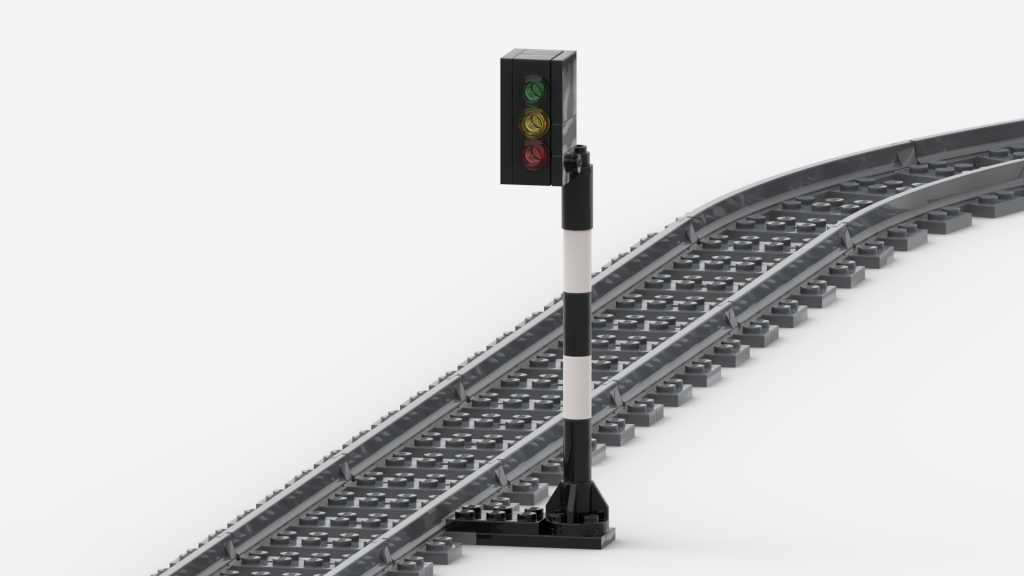
About the signal
The shape and functionality of the train signal is based on current Dutch light signals.
From Wikipedia: The current Dutch railway signalling system operated by ProRail has been in effect since 1954 on the Dutch Railways network. The system was designed to be one of the simplest in Europe and is integrated to the ATB, the system of cab signalling widespread on the Dutch network. Dutch trains normally use the right-hand track and the signals are placed at the right of the track; in sections also equipped to run on the left track, the signals are placed on the left.
How to build the signal

Building Instructions Dutch Signal V1.0.pdf
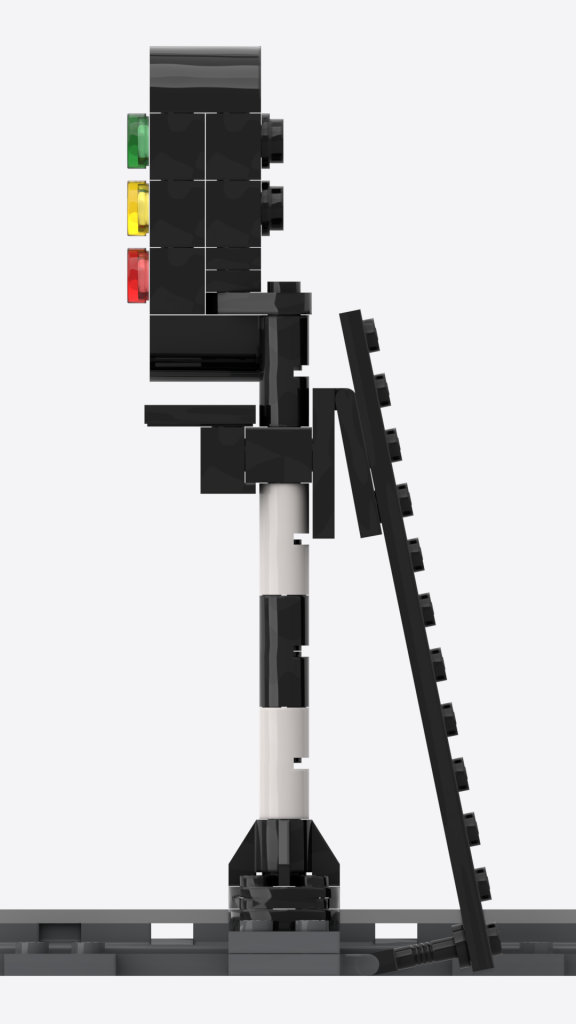
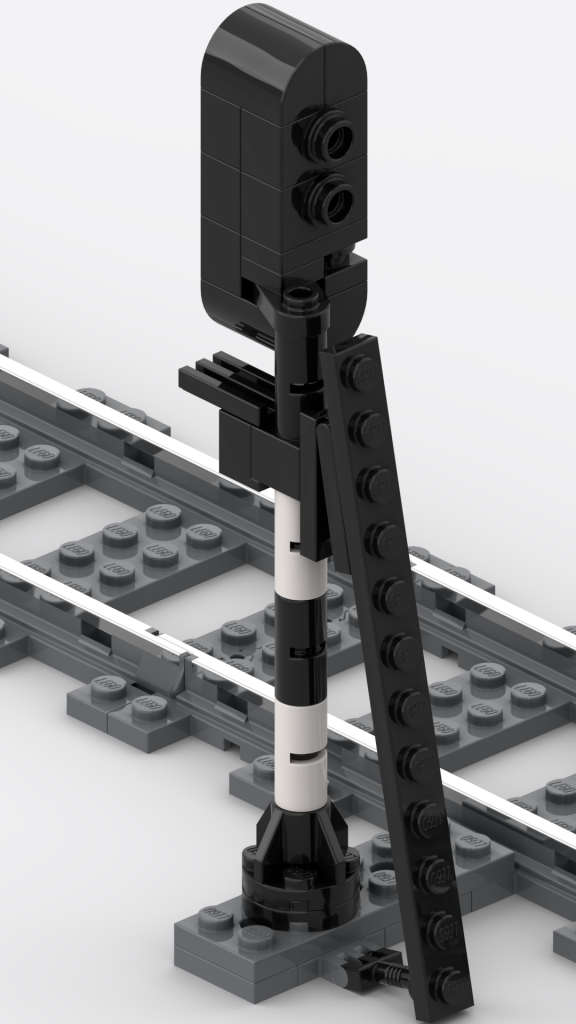
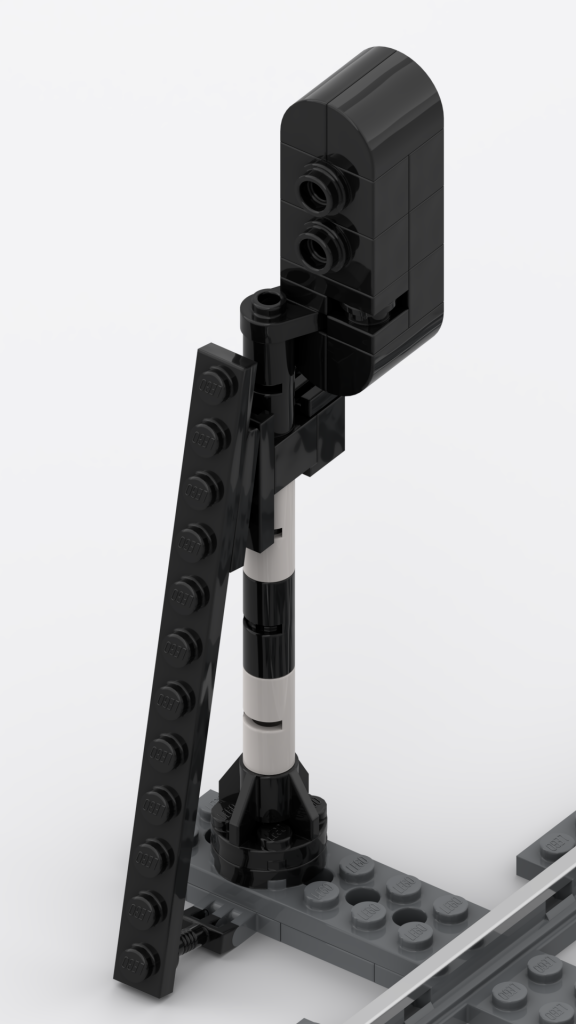
The following pictures may also help you building the signal.

Required Parts
The signal can be built with standard LEGO parts and some extra parts as described below. No printed parts are required for this signal.
Additional parts are:
- 3 clear-white LEDs (3mm)
- Thin copper wire with black lace to power up the LEDs (diameter 0,15 mm)
- Single Studs (“Einzelnoppen”; available for example at Bluebrixx).
Lights
To equip the signal with lights, I have used 3 clear-white 3mm LEDs. The LEDs fit perfectly into the holes of the LEGO parts as shown on the pictures. The wires are very thin, black copper wires used for model scale train layouts. The wires can be put into the mast to become invisible. To prevent the LEDs from burning off and to save electrical power, you may want to add some resistors to limit the current through the LED. At a voltage of 3,3V, 120 Ohm should usually be a good value. In question read the data sheet of your LEDs.
I might add some more pictures of the wired signals here later.
Automation
The signal is automated with a MattzoLayoutController (MLC). The MLC controls the LEDs.
Find more details about the MLC here.
To use the MLC with signals is described here.
In the firmware, there is a two aspect light signal configured in the default configuration. If that’s fine for you, you’re good to go. If you want to use the signal as a three aspect signal (with a yellow aspect), you can sacrifice a servo or a sensor, and add an additional LED instead:
const int NUM_LEDS = 3;

LEDConfiguration ledConfiguration[NUM_LEDS] =
{
 {
  .pin = D4,
  .pinType = 0
 },
 {
  .pin = D5,
  .pinType = 0
 },
 {
  .pin = D6,
  .pinType = 0
 }
};
Then extend the signal by the third aspect:
const int NUM_SIGNALS = 1;
const int NUM_SIGNAL_ASPECTS = 3;
const int NUM_SIGNAL_LEDS = 3;
const int NUM_SIGNAL_SERVOS = 0;
SignalConfiguration signalConfiguration[NUM_SIGNALS] =
{
 {
  .aspectRocrailPort = {1, 2, 3},
  .aspectLEDPort = {0, 1, 2},
  .aspectLEDMapping = {
   {true, false, false},
   {false, true, false},
   {false, false, true}
  },
  .servoIndex = {},
  .aspectServoAngle = {}
 }
};
Enjoy!
Credits
The signal was designed by Matthias Runte of MattzoBricks in 2022, who also compiled the building instructions.
The design was inspired by professional railway signal expert Lucas van der Hoeven, who had the idea, built a similar signal, and used it on his automated Christmas 2021 layout. This LEGO train layout is documented here on the mattzobricks.com website in the projects section.
Thank you, Lucas for your contribution.
I DON’T UNDERSTAND IN PICTURE NINETEEN WHICH LEGO PART CODE IS
READ THE PAGE! THE PARTS ARE CALLED SINGLE STUDS (available e.g. from Bluebrixx).