
Please read the general section first!
Purpose
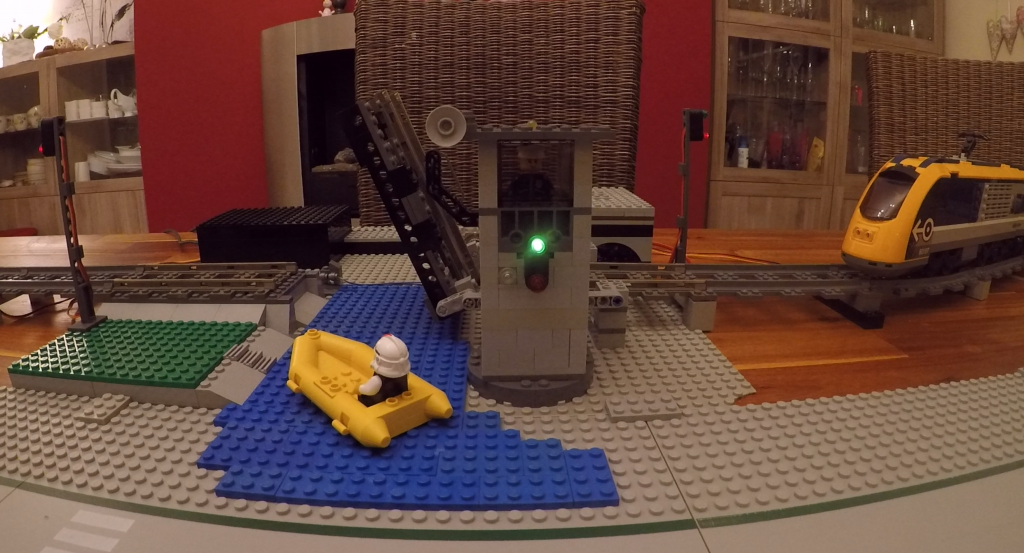
The MattzoLayoutController is used to control bascule bridges or similar components.
The underlying idea is to automate a bascule bridge over which train lines are running. These bridges must frequently open due to ships crossing the river or bay under the bridge.
Functional Description
The MattzoLayoutController is fully controlled by Rocrail commands via MQTT.
The controller controls a motor that opens and closes the bridge. The states “open” and “close” are determinated by reed sensors. The sensor events are reported back to Rocrail. After the sensors are triggered, there is usually some extra time to fully close or open the bridge. After the extra time has expired, the bridge has reached its final position, the motor is stopped and a virtual sensor event is sent back to Rocrail to announce the “fully open” and “fuly closed” state.
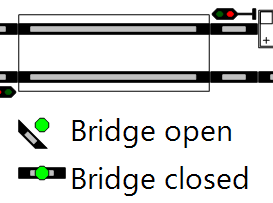
When the bridge is fully open, a green signal indicates that boats can pass the river beneath the bridge. If the bridge is moving or closed, the signal is red. A flashing yellow LED indicates that the bridge is moving. When the bridge is opening, a small white LED next to the red signal indicates the upcoming opening of the bridge and that captains shall start their engines. All lights are optional.
If not fully closed, the train or trains can not pass the bridge and will stop ahead of it. The closed state of the bridge is secured by the closing sensor. If this sensor is released while the bridge is in the closed state, an emergency brake is broadcast to all trains.
Rocrail will only permit trains to go over the bridge when the bridge is fully closed. The bridge can be opened only if no train is on the bridge or approaching the bridge. The bridge can opened and closed via the Rocrail user interface. Additionally, Rocrail can also trigger automatic, time scheduled opening and closing operations of the bridge if desired.
Both single and double track bascule bridges are supported.
From firmware 0.5, bascule bridges may have more than one bridge leaf. Each leaf requires a bridge motor. The leafs are opened and closed with configurable starting delays. These delays may be used to simply enhance realism, but also to support overlapping bridge mechanics that require that one leaf closes before another one lays itself on top of it. The different bridge leafs may, but do not have to be built symmetrically. There is almost no limit to design any kind of bridges that can be powered with the MattzoController.
Media
Before continue to read, you should have a look at the following video. There is also a German version.
Bridge Motors
In firmware 0.4 and 0.4.1, standard LEGO motors were used (as in the video above). The problem with this motor is, that is requires a separate motor shield, which uses a lot of space, requires two pins on the controllers and needs to be wired.
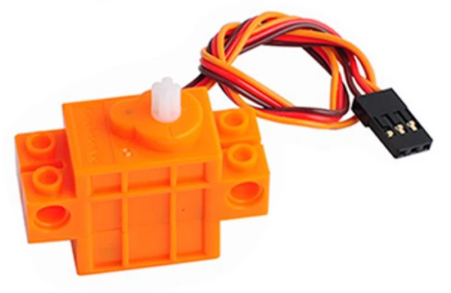
To overcome this problem, the motor support was changed in firmware 0.5 to support continuous servos. These kind of servos act like motors, but can simply be controlled like a standard servo like for switches or form signals. The wiring and handling is significantly easier.
We use these orange servos, which are widely available on the internet (e.g. on Ali Express). Please note that they are different types of servos from the same vendor, which have different colors. THE COLORS HAVE A MEANING – servos with other colors work different and may not be CONTINUOUS servos, so make sure you order the correct ones.
Wiring
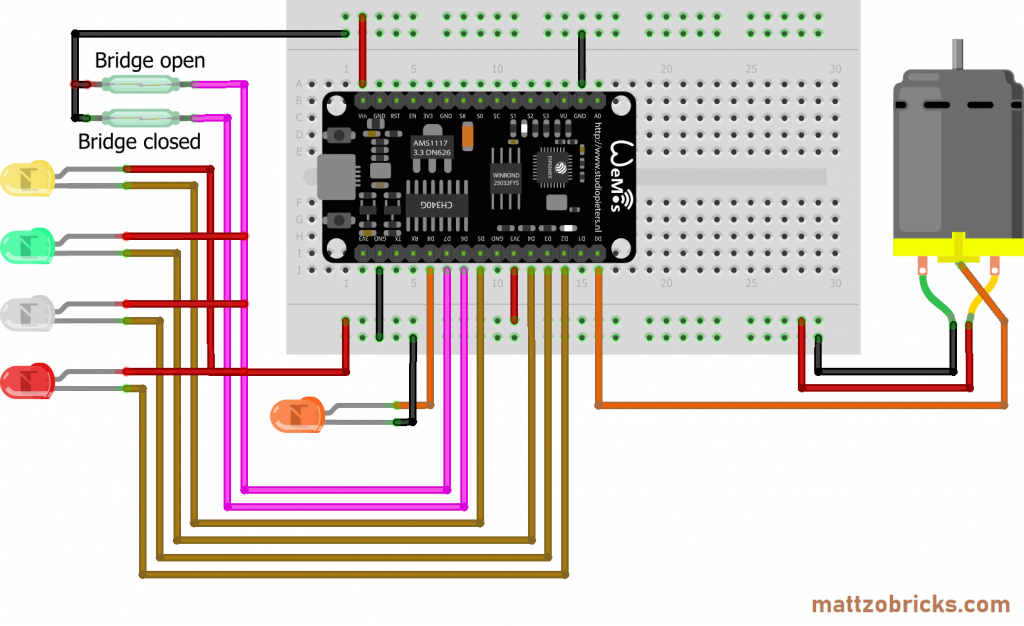
The following wiring diagrams shows the standard configuration for the wiring of the MattzoLayoutController with Bascule Bridges with a single leaf:
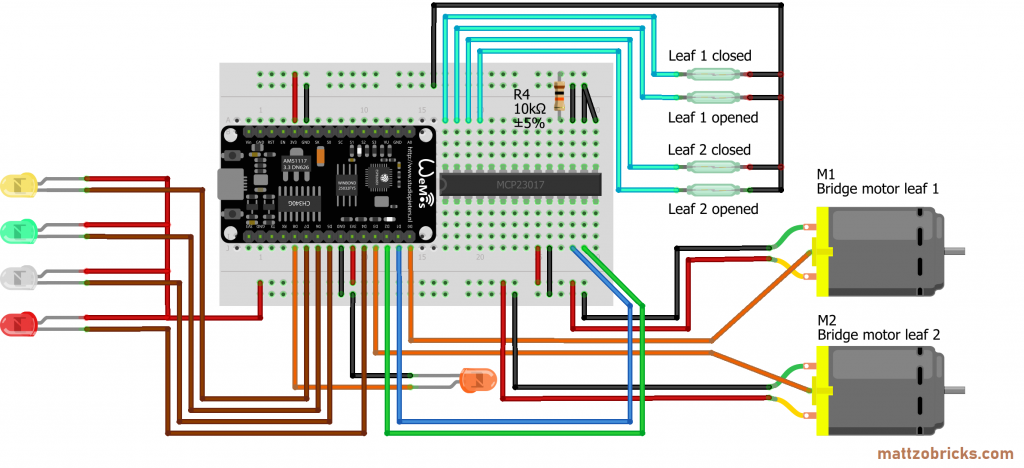
The next wiring diagram shows a double leaf bascule bridge. In order to provide enough ports, the MattzoLayoutController was extended with a MCP23017 port extender:
Required components
- I/O board with micro controller. We have used a NodeMCU Amica Modul V2 ESP8266 ESP-12F. Similar modules should work as well.
- One continuous servo per bridge leaf
- LEDs in different colors (optional).
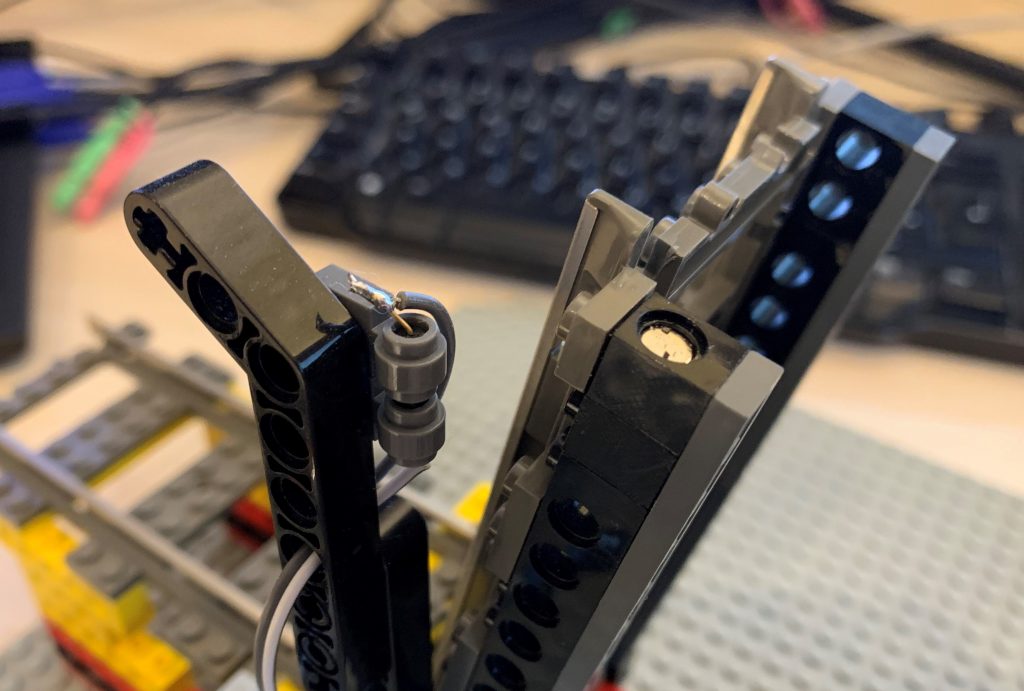
- Two reed sensors per bridge leaf (one to detect the “opened”, one for the “closed” state).
- Bridge with multiple leafs may require a port extender PCA9685 or MCP23017 to provide enough ports for the required number of servos, sensors and lights. In doubt, I would probably choose the MCP23017.
- Basic stuff like bread board, resistors, wires etc.
The status LED indicates to WiFi connection status, the MQTT connection status and lights up when one or more sensors are triggered. The status LED is very handy in practice. Therefore, this wiring option is recommended.
Please note that the bridge is usually fully opened or fully closed when the microcontroller boots. Therefore the pins must be respected to which the sensors are connected (see MattzoSensorController), and if they are connected to the plus or minus terminal on the non-microcontroller side. We also had problems with a closed sensor during boot on pin D4. If you experience similar problems, do not use this pin for sensors.
Rocrail Configuration
The configuration of a bascule bridge in Rocrail is a pretty complicated task. There is almost no documentation about this in the Rocrail help, and only very sparse and cryptic information in the forum and elsewhere. So do yourself a favour and follow the instructions below instead of wasting of hours of figuring this out by yourself (as I had to do).
As a general hint, please note the bridge object is handled like an “accessory”, which in turn is basically handled like a “switch” in Rocrail.
Rocrail does not care if your bascule bridge has just one or multiple leafs. The different leafs are handling completely inside the MattzoController and transparent to Rocrail.
Add the Bascule Bridge
Add a single or double track bascule bridge to your Rocrail plan and call it “bridge”.
Enable switch feedback
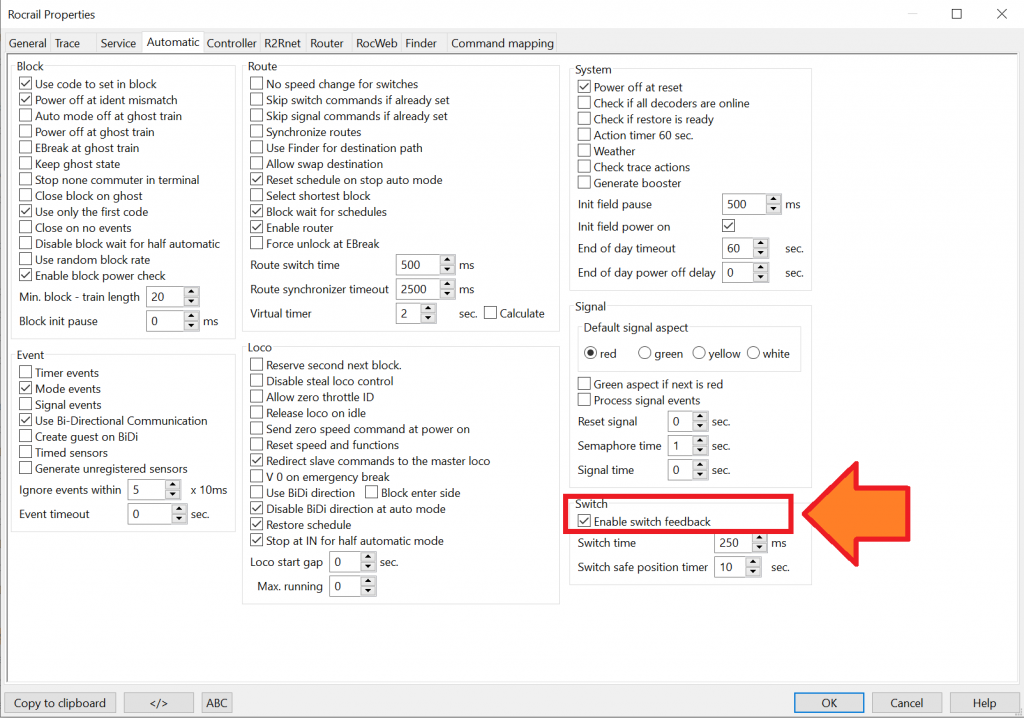
First, we need to activate a Rocrail feature called “switch feedback”. Switch feedback is mechanism that allows if an appliance on the layout has actually reached its desired status after it has received a command. Switch feedback is available for most components that are logically handled as switches in Rocrail, e.g. switches themselves, level crossings and – bascule bridges!
Navigate to the Rocrail properties, choose tab “Automatic”, and activate the option “Enable switch feedback” in the “Switch” box:
Please note that you need to restart Rocrail before the setting is effective.
Add the Sensors
Add two sensors to your plan and call them “fb-bridge-open” and “fb-bridge-closed”. Do not connect those sensors to your track layout.
Create two text labels and position them next to the sensors.
Create Routes
Create the required routes that lead over the bridge. Whenever possible, use the auto router for perform this job, as it relieves you from a lot of tedious work.
The result of the auto router is pretty good for single track bascule bridges, but it’s not perfect for double track bascule bridges.
For double track bascule bridges, we need to do some changes to these routes generated by the auto router:
- Open the route configuration dialog, select one of the routes that lead over the bridge and navigate to the tab “Commands”. Identify the “switch command” to close the bridge. Change the “Lock” setting of this command from “Lock” to “Open”.
- Repeat this procedure for the other routes that lead over the bridge.
WARNING: make sure you complete the “Routes lock” configuration for the bridge further below. If you miss that part, the resulting configuration is unsafe and the bridge could be lifted while a route is set over the bridge, which may cause a crash desaster on your layout.
Configure the Bridge
Open the configuration dialog for the bridge.
Tab “General”:
- Check “Manual operated”.
Tab “Interface”:
- Set the address of the controller. Set port to “1”. This is the logic port in the MattzoLayoutController for opening and closing the bridge.
Tab “Wiring”:
- Set “sensor turnout” to “fb-bridge-open”.
- Set “sensor straight” to “fb-bridge-closed”.
Tab “Control”
- Check “Activate”
- Check “Auto mode”
- Set “interval” to 30 seconds. This is the time that the bridge will remain closed after it was fully closed until it is opened again.
- Set “delay” to 10 seconds. This is the time that the bridge will remain open after it was fully opened until it is closed again.
The proposed values for “interval” and “delay” are good for a start. You can change them later to fit your specific needs or preferences according to the Rocrail documentation.
If you configure a double track bascule bridge, and have conducted the changes to the routes as described above, you must complete another absolutely crucial task in the “Control” tab:
- Routes to lock: you IMPERATIVELY must select all routes that lead over the bridge to make sure that the bridge is closed and remains closed when a train approaches or is on the bridge.
WARNING: if you create new routes that lead over the bridge later, you must review these settings and add those router to the “routes to lock” selection above. If you forget to do this, the bridge is unsafe and might be opened during a train is on the brige.
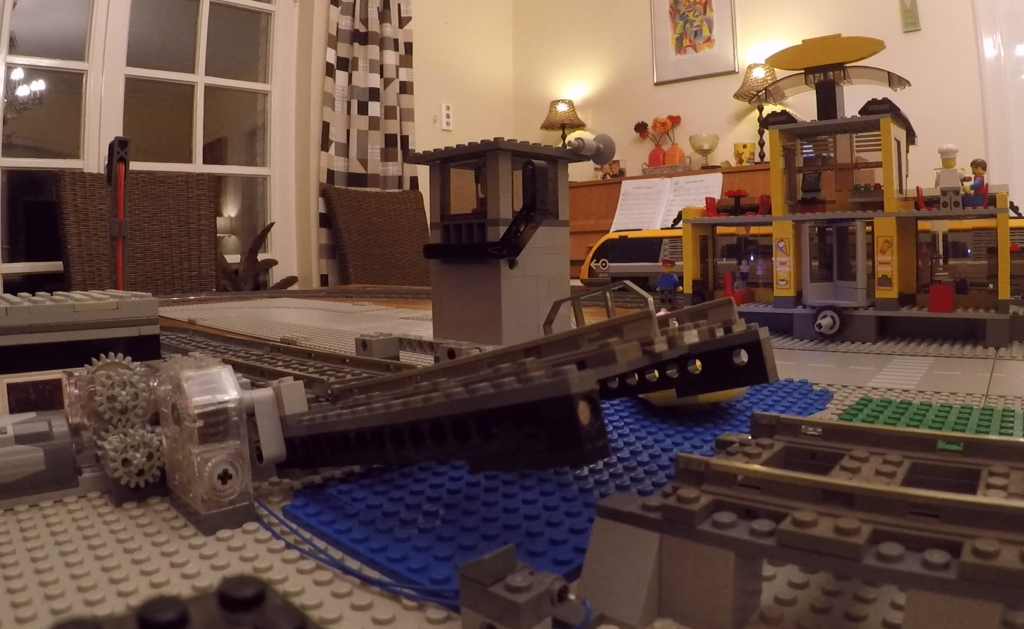
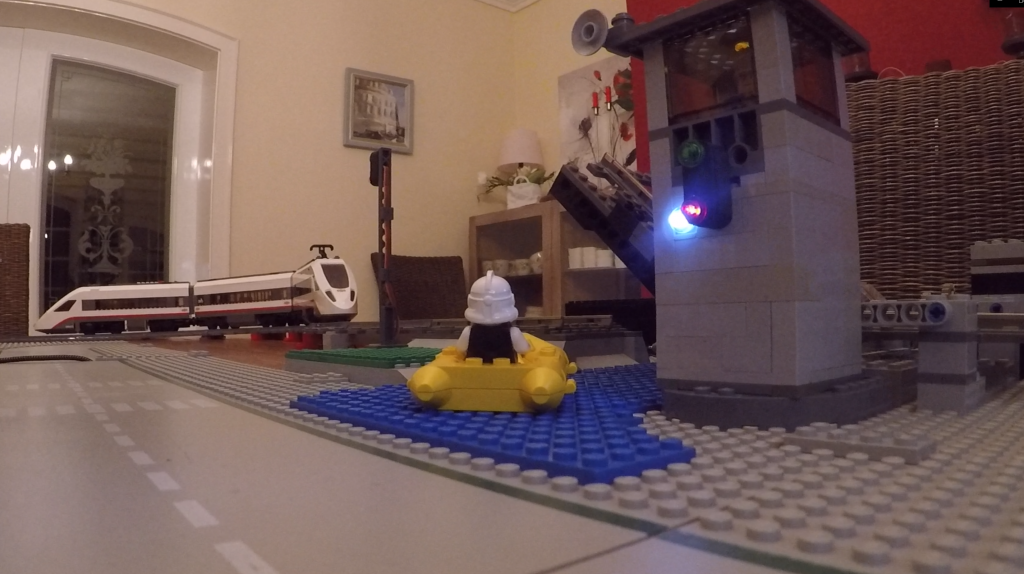
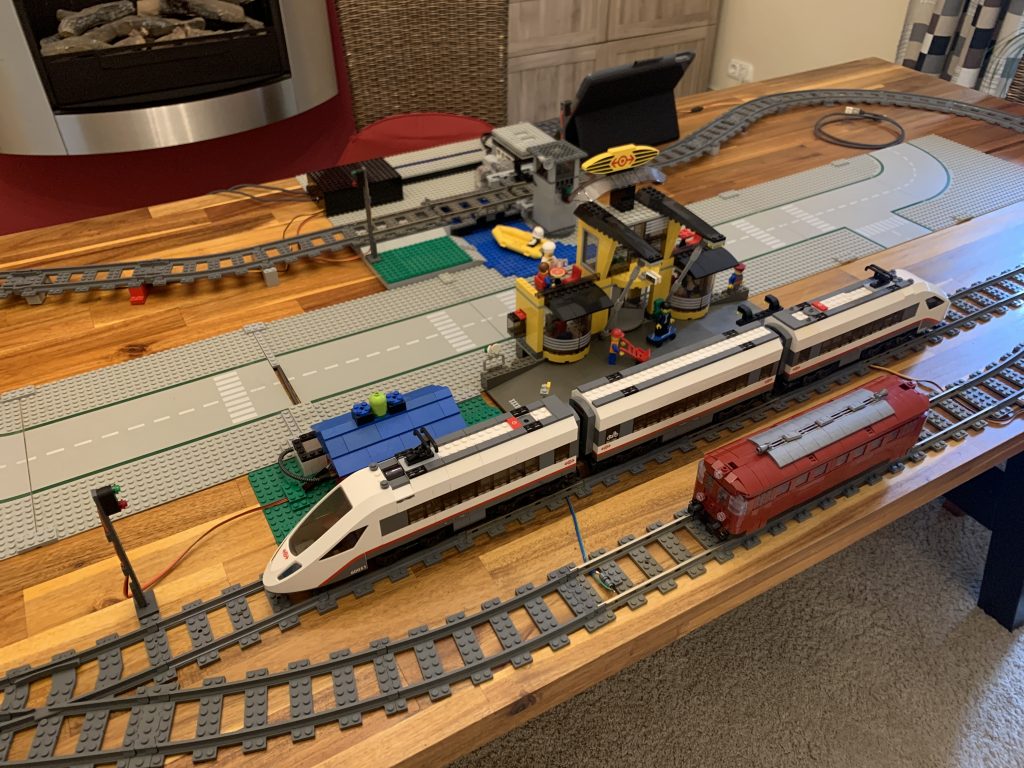
Example Layout
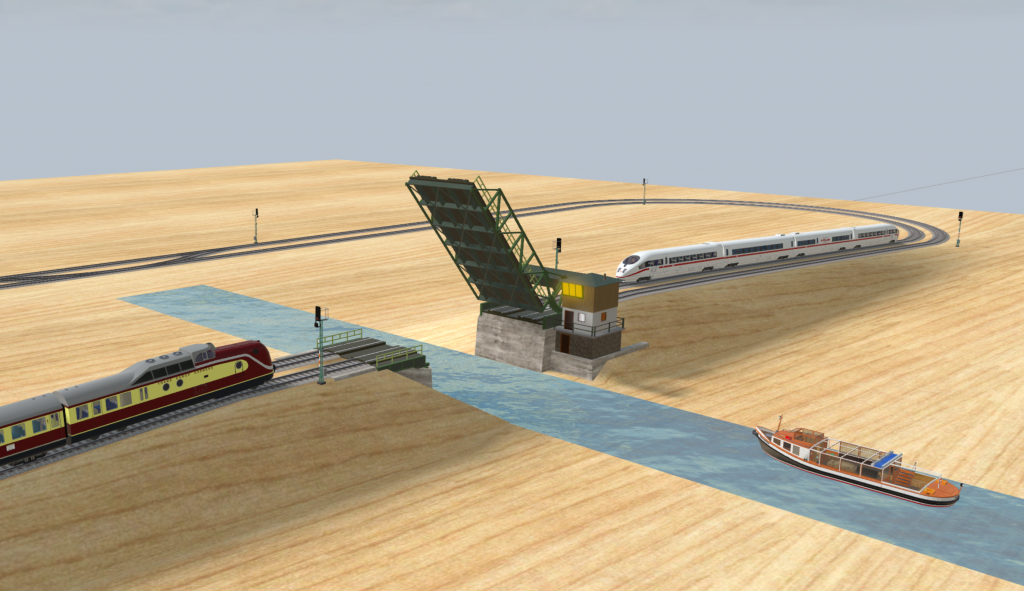
Simulation
It is also possible to simulate the bascule bridge in 3D Model Train Studio, though the full setup including the feedback sensors requires some work-arounds.
Firmware Configuration
Please read the MLC general page first.
To configure the firmware configuration, you need to edit the controller configuration file (controller_config.h).
In this file, the following sections are relevant:
- SERVO WIRING CONFIGURATION (for the bridge motors),
- LED WIRING CONFIGURATION (for the lights),
- SENSOR WIRING CONFIGURATION (for the sensors), and
- BASCULE BRIDGE CONFIGURATION (for the overall operation of the bascule bridge).
The sections are clearly marked in the standard configuration file, and the different parameters are explained with code comments, so you shouldn’t have too many problems to understand what you need to do.
Enjoy!