
Please read the general section first!
Purpose
The MattzoLayoutController (MLC) is designed to receive switch commands from Rocrail via the MQTT broker and flip a switch into the requested direction.
Functional Description
When Rocrail request a switch to turn into a specific direction, it communicates this as a command via the MQTT broker. The MattzoController receives this command and evaluates, if the command is relevant for the specific controller (i.e. if the switch is connected to this controller).
The switch command contains the controller id and port to which the switch is connected to, and the requested direction of the switch.
The number of switches that can be attached to one MattzoController depends of the number of servos that the switch requires:
- A standard switch has one switch motor, and needs one port. Up to eight standard switches can be connected to one MattzoController.
- A triple switch has two switch motors, and needs two ports. Up to four triple switches can be connected to one MattzoController.
- A double slip switch has four switch motors, and needs four ports. Up to two doube slip switches can be connected to one MattzoController.
You can also connect any combination of different logical switches types to a MattzoController, e.g.:
- 2 Standard, 3 Triple
- 4 Standard, 2 Triple
- 6 Standard, 1 Triple
- 4 Standard, 1 Double Slip
- 2 Standard, 1 Triple, 1 Double Slip
- 2 Triple, 1 Double Slip
Wiring
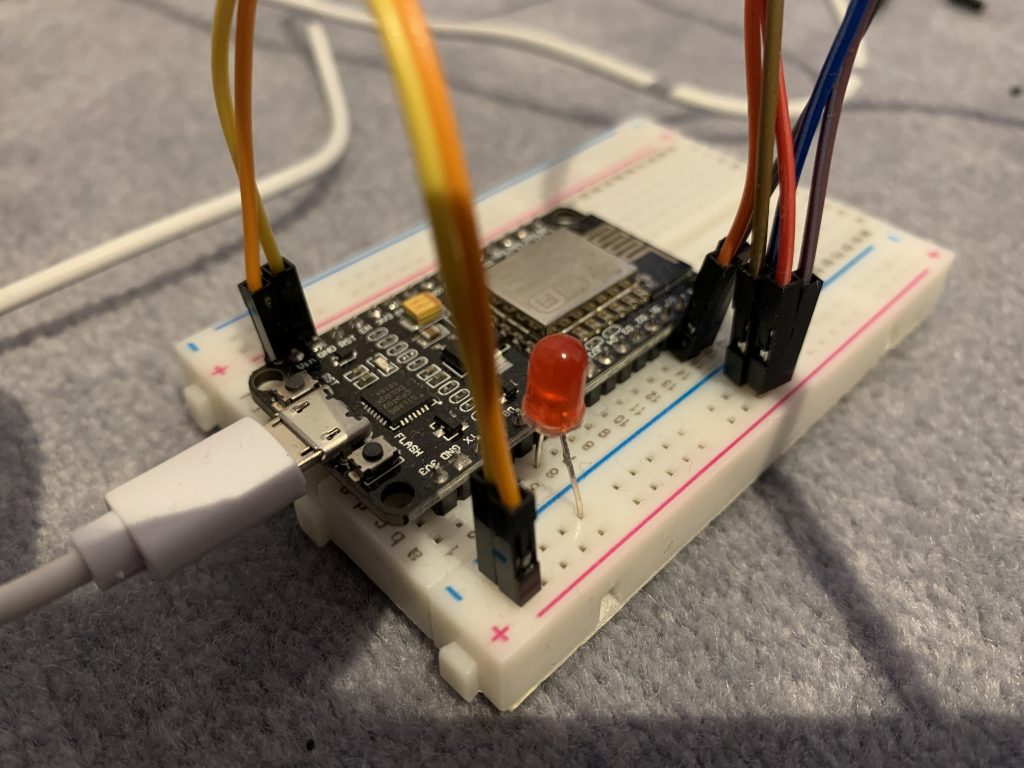
The following sketch shows the wiring of the MattzoLayoutController with 8 switch motors attached:
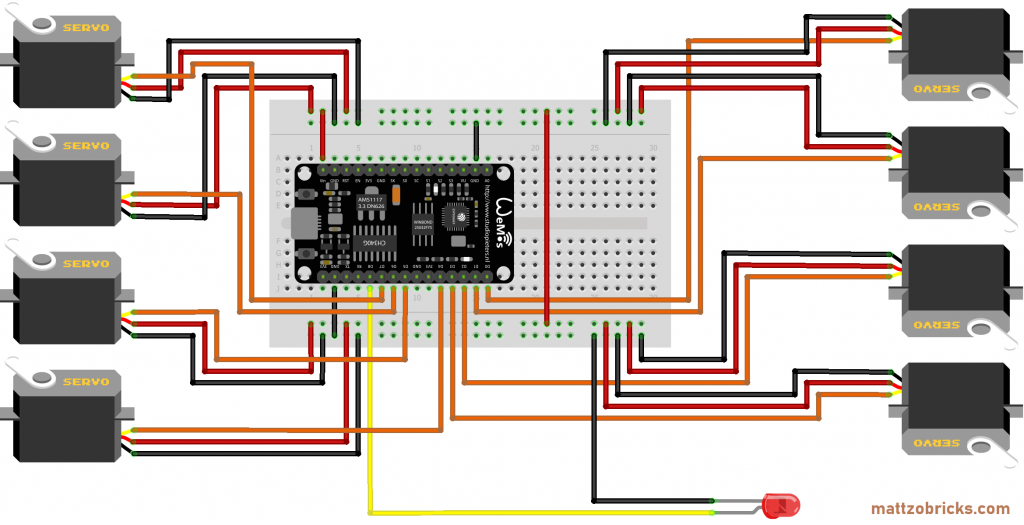
As you can see, you simply connect the PWM wire (usually orange) of the servos to the output pins D0 to D7, connect the red wire (plus) to VIN and the black wire to GND (ground).
Required components:
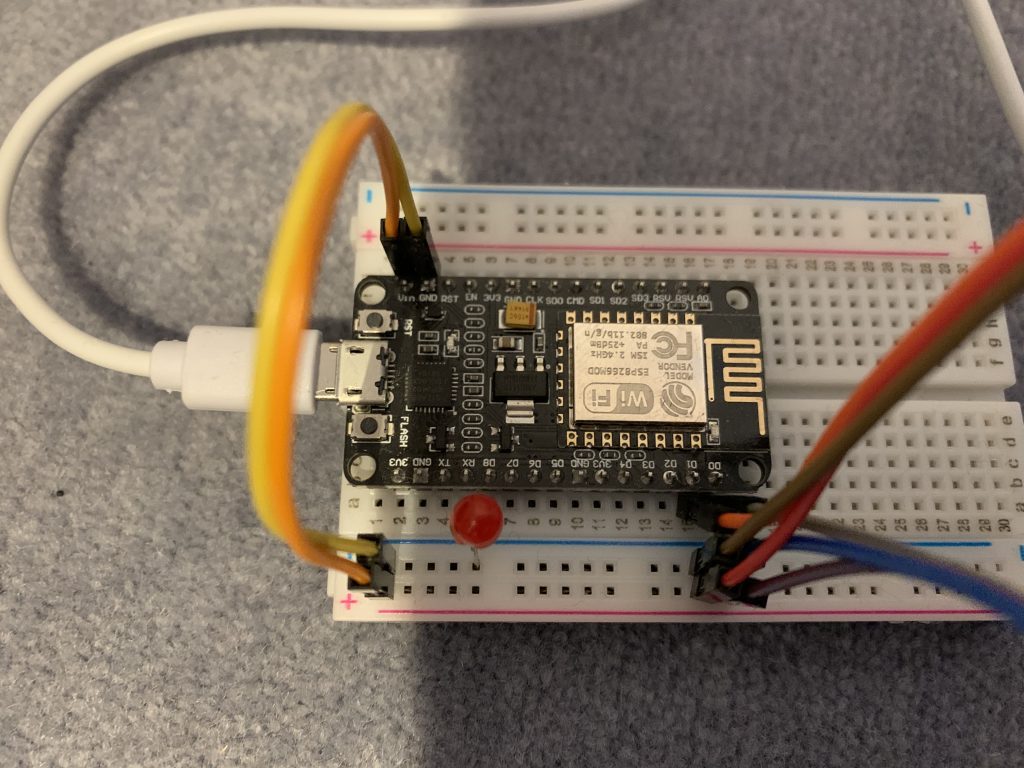
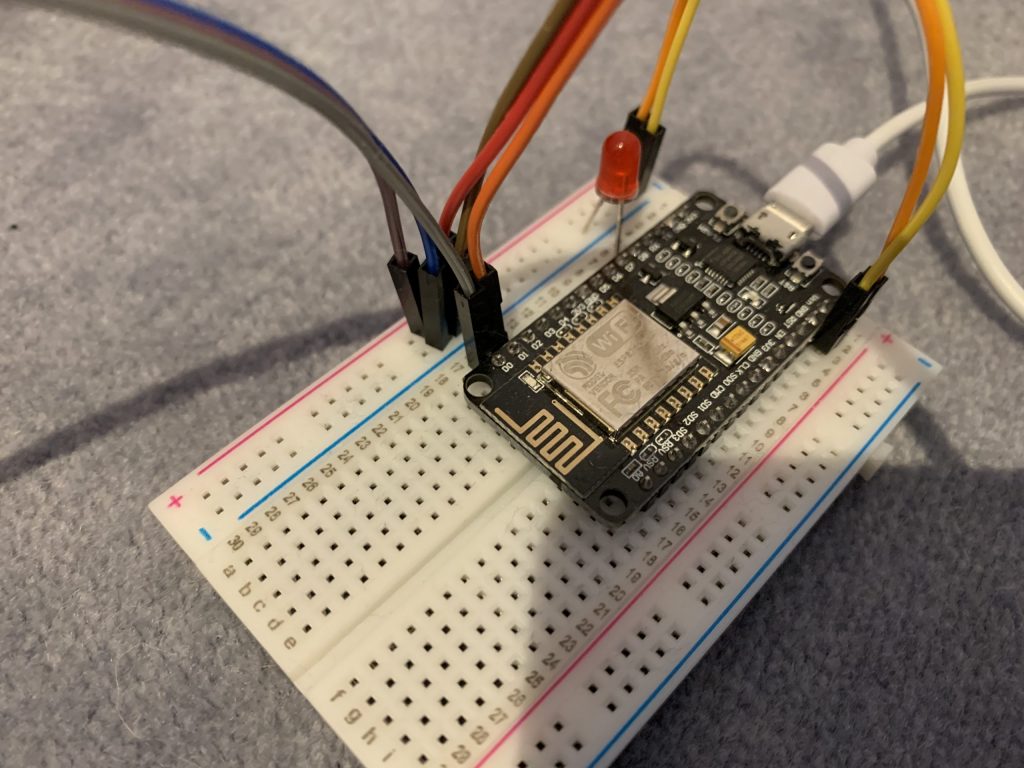
- I/O board with micro controller. We have used a NodeMCU Amica Modul V2 ESP8266 ESP-12F. Similar modules should work as well.
- Basic stuff like bread board, wires etc.
An optional LED can be installed on pin D8 to monitor the correct operation of the controller. It is indeed a good idea to connect the LED to D8, because this pin must necessarily be pulled down or the controler will not boot correctly.
Power Supply
Sufficient power supply is crucial because the servo motors require some power to flip the switches. If the power supply is to weak, the voltage in the micro controller goes down, which can cause a crash of the controller. We have made pretty good experiences with power supplies that deliver 2 amps.
The controller can be powered up with a simple USB charger over USB or some other power supply of similar voltage that is connected to the VIN and GND pins of the controller. If you use a different power source, voltage should be in the range between 4.5V and 6V.
Firmware Configuration
Please read the MLC general page first.
To configure the firmware configuration, you need to edit the controller configuration file (controller_config.h).
In this file, the following sections are relevant:
- SERVO WIRING CONFIGURATION, and the
- SWITCH CONFIGURATION.
The sections are clearly marked in the standard configuration file, and the different parameters are explained with code comments, so you shouldn’t have too many problems to understand what you need to do.
Rocrail Setup
For general setup instructions please refer to the “General” section.
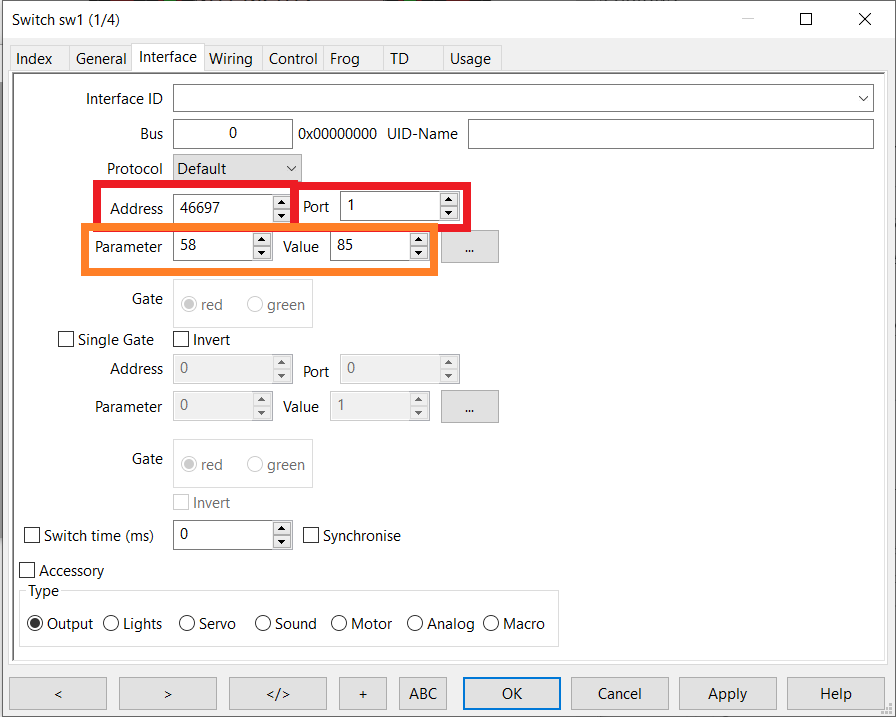
Standard Switch
To setup a standard switch in Rocrail, navigate to the interface tab of the switch definition. The MattzoControllerID must be entered as “Address” parameter, and the port to which the switch is connected as “Port”.
Enter the minimum value of the switch servo motor into the “Parameter” field, and the maximum value into the “Value” field.
ALL OTHER INFORMATION ON THIS PAGE CAN BE NEGLECTED AND HAS NO MEANING!
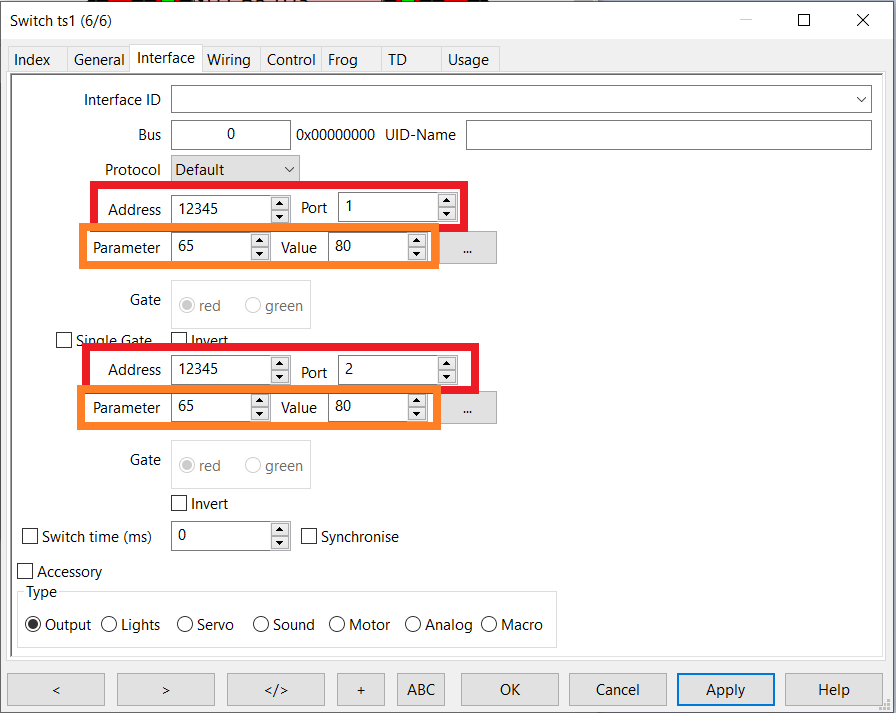
Triple Switch
To setup a triple switch in Rocrail, navigate to the interface tab of the switch definition. As we are configuring two switch motors now, we need to configure everything twice compared to the standard switch.
The MattzoControllerID must be entered as “Address” parameter, and the ports to which the switch is connected as “Port”.
Enter the minimum value of the switch servo motors into the “Parameter” fields, and the maximum value into the “Value” fields.
ALL OTHER INFORMATION ON THIS PAGE CAN BE NEGLECTED AND HAS NO MEANING!
Double Slip Switch
To setup a double slip switch in Rocrail, navigate to the interface tab of the switch definition. What we are now doing is to configure four physical switch motors with just two logical ports in Rocrail.
The MattzoControllerID must be entered in both “Address” fields.
The first port must be configured as port “1001”, the second port as port “1002”. This setting assumes that the first two switch motors are attached to port 1 and 2 of the controller, and the other two switch motors are attached to port 3 and 4 of the controller.
If you are configuring two double slip switches on a single controller, the second switch has ports 1003 and 1004, which requires ports 5 to 8 on the controller for the switch motors.
Enter the minimum value of switch servo motors into the “Parameter” fields, and the maximum value into the “Value” fields. The values are valid for pair 1/2 and 3/4 of the switch motors and can not be modified individually.
ALL OTHER INFORMATION ON THIS PAGE CAN BE NEGLECTED AND HAS NO MEANING!

Tipps and Tricks
Flattering servos
In some deployment scenarios, we have experienced flattering servos. We believe that this is caused by a “brown-out”, which happens when the power supply voltage for the servos breaks down.
To overcome this problem, you need to make sure that the MattzoSwitchController has enough power. If you power up the controller with USB (4,65V), you should use a charger with 2 Amps minimum. Using higher voltage also helps.
Other countermeasuers include:
- Reduce the length of your cables.
- Use drilled cables.
- Reduce the number of servos attached to the controller.
But, as written above, the root cause for the problem is usually too little power.
We also plan to improve the firmware of the controller to mitigate the problem.
Hi Mattzo,
What kind of servo motors do you use? Mainly TrixBrix I presume?
Cheers,
Raymond
Hi Ray,
indeed I use Trixbrix servo motors. The reason is that I operate almost completely on R104 Trixbrix switches because of their superior geometry, and their larger curve radii. The Trixbrix servo motors fit perfectly on the Trixbrix switches.
Anyway, you may use any servo to operate your switches. Just make sure you calibrate the correct servo angles, and don’t block the servo by turning it into angles that it can not achieve – this will destroy the servo or something else sooner or later.
I am aware that some systems turn the servo, and then go back a couple of degrees after 2 seconds to relieve the servo arm. I believe it’s not necessary when you calibrate your servos carefully, but maybe I will add this option later to the MattzoSwitchControllers.
Could you recommend an alternative to NodeMCU Amica Modul V2 ESP8266 ESP-12F as this can not be purchased anymore
thanks
Hi Andrew,
I think you can use almost any ESP8266 or ESP12 to do the job. Be a bit careful if you use D1 Minis, they do not cope with 9V input voltage. You need a step down module for those controllers.
For the future, I recommend to ask those questions in out new Forum. Navigate to “My Mattzobricks / Forum”.
Cheers,
Mattze