
On this page, you find information about:
- how to build a German Combination Signal with LEGO bricks,
- equipping the it with lights,
- automating the signal with a MattzoLayoutController.
Media
I have created a video about light main signals:
Deutsche Version:
About the signal
The signal was designed by Matthias Runte of MattzoBricks in 2020.
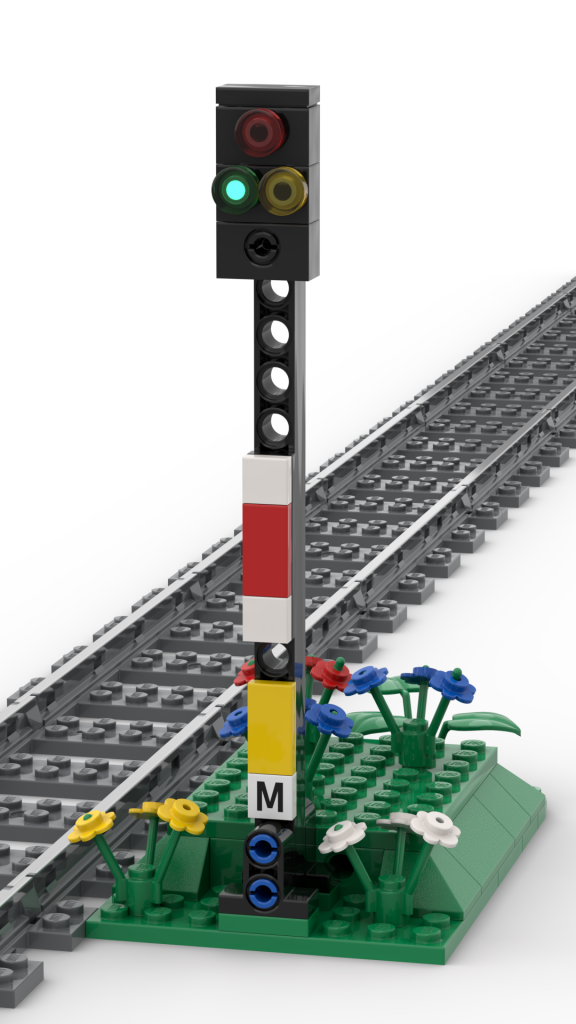
Shape and functionality is based on the German Combination Signal (Kombinationssignal, Ks-Signal). The signal was introduced in 1994 and since then replaces older signal types on German railroads.

Options
The original signal has a lot of different options and additional indicators. The Mattzobricks design has adopted the main three lights of the signal. Using these lights, typically four aspects can be shown.
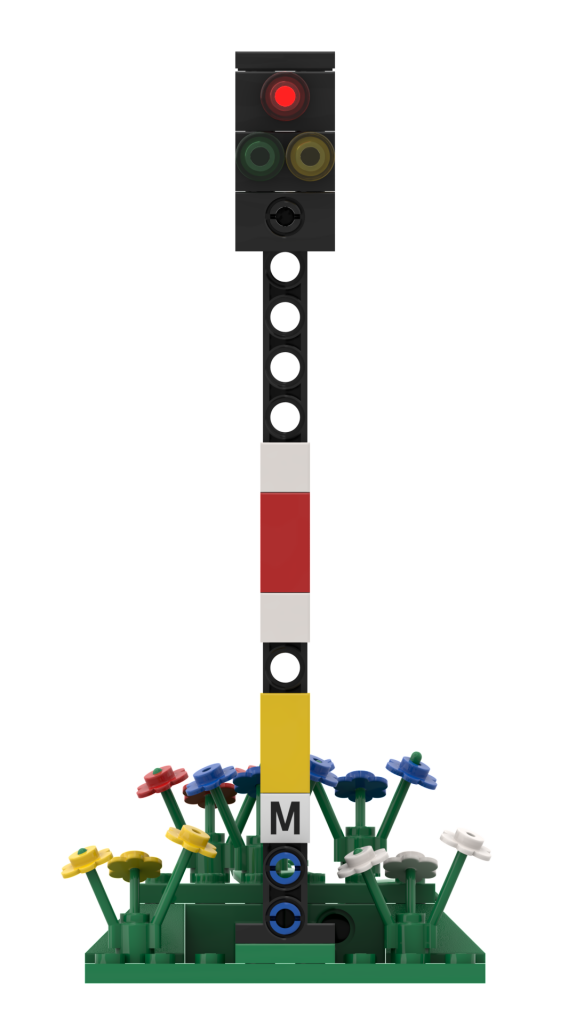
Hp0 – Stop (Halt)
The signal shows a constant red light. The vehicle must stop ahead of the signal.
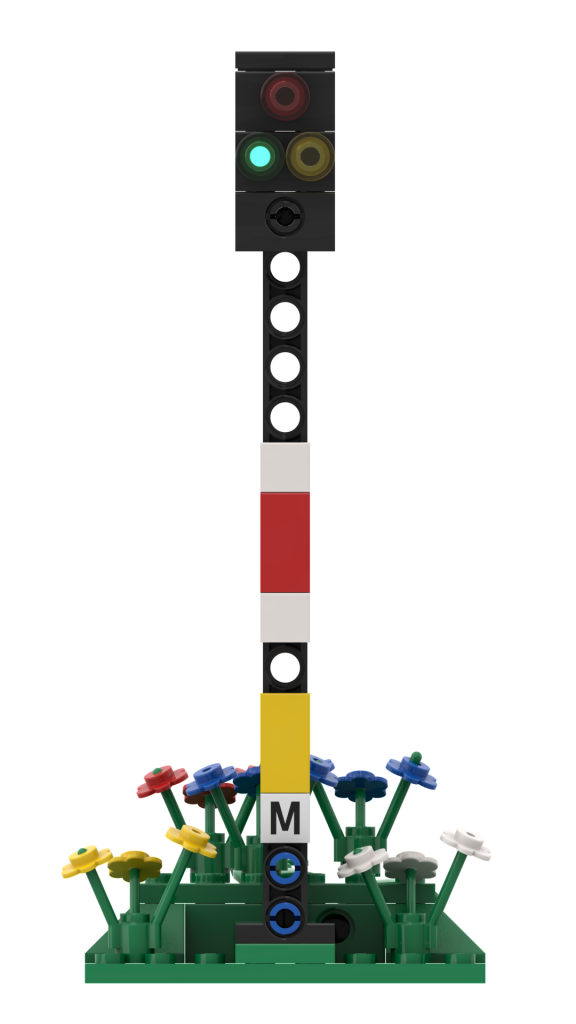
Ks1 – Clear (Fahrt)
The signal shows either:
- a constant green light. The vehicle may pass the signal.
- a flashing green light. The vehicle may pass the signal, and there is a speed limit ahead.
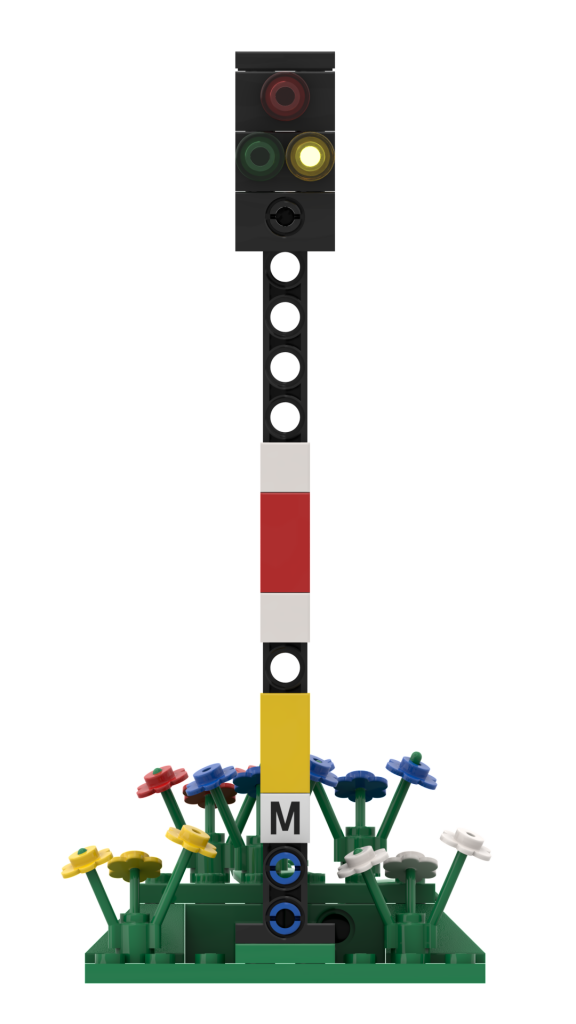
Ks 2 – Expect Stop (Halt erwarten)
The signal shows a constant yellow light. The signal may be passed, but the next main signal shows “stop”.
How to build the signal
(this section will be added in the future)
Required Parts
The signal can be built with standard LEGO parts and some extra parts as described below. No printed parts are required for this signal.
Additional parts are:
- LEDs (3mm) in different colours. Quantity and type depend on the options of the signal that you like to add to your signal.
- Thin copper wire with black lace to power up the LEDs (diameter 0,15 mm).
- Basic stuff like a wire board, cables, plugs and connectors.
Lights
To equip the signal with lights, I have used 3mm LEDs in different colours. The wires are very thin, black copper wires used for model scale train layouts. The wires are led from the top of the signal through a pipe on the backside of the signal post. To prevent the LEDs from burning off and to save electrical power, you can add some resistors to limit the current through the LED. At a voltage of 3,3V, 120 Ohm should usually be a good value. Red LEDs usually require larger resistors than others. In question read the data sheet of your LEDs.
Automation
The signal is automated with a MattzoLayoutController (MLC). The MLC receives commands from Rocrail and lights up the correct LEDs for the current signal aspect.
Find more details about the MLC here.
To use the MLC with signals is described here.
Enjoy!