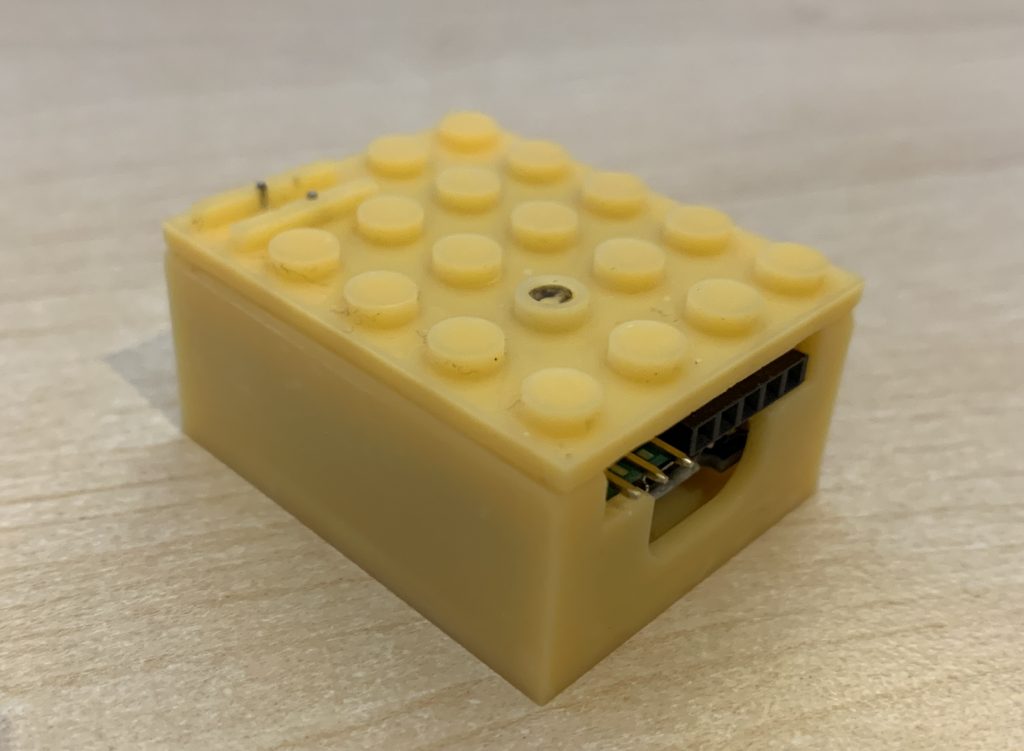
Controllers are required to power up and control components like locomotives, sensors, signals and switches. They are also handling the communication between those components and the central automation software.

Introducing the “MattzoController”
We have developed our own family of “MattzoControllers” for the LEGO train system.
The controllers are not for sale, but you can build them yourself with some very inexpensive components that are commonly available. I am publishing information about it here, so that anybody who is interested and feels capable can build it himself.
We also publish information how you can print a nice case with a 3d printer including the required 3d files.
MattzoControllers are based on a micro controller that unifies digital processing, input/output from/to the railway component, and WIFI connectivity.
MattzoControllers communicate via WIFI with a communication hub called “MQTT Broker” via the “MQTT” protocol.
The controller firmware is open source, free of charge and a gift to the LEGO train community.
The present firmware for the MattzoControllers is built for interaction with “Rocrail”. Rocrail is a free and powerful software to control model railways. MattzoControllers natively understand the Rocrail protocol. That means, that no other translation layer is needed to enable the communication between Rocrail and MattzoControllers.
Types of MattzoControllers
As of now, the following MattzoControllers exist:
- MTC4PF: MattzoTrainController for Power Functions
- Used to operate trains with Power Functions Technology. Based on the ESP8266 platform.
- MTC4BT: MattzoTrainController for Bluetooth
- Used to operate trains with LEGO Powered Up hubs, SBricks and BuWizz2 units. Also used to connect Powered Up remote controls to the Mattzobrick Train Automation System. Based on the ESP32 platform.
- MLC: MattzoLayoutController
- For motorized switches, light and form signals, sensors, level crossings, bascule bridges and everything else that is not riding on a train. Based on the ESP8266 platform.
The electrical wiring and the firmware of the controller types are different, but all controllers also have strong similarities.
Where to start?
To familiarise with MattzoControllers, we recommend to read the general section first.
We wish you all the fun that we had when we developed them!
Enjoy!

Hallo Mattze,
Kompliment nochmal. Die Idee mit den Mattzo-Controllern über WLAN/MQTT ist der Hammer. Voller Enthusiasmus habe ich Deine Ideen nachgebaut und im Bereich Signale, Rückmeldung und Weichen alles bestens zum Laufen bekommen.
Leider stürzt der Train Controller für PF im Bootvorgang permanent ab. Dies zu erörtern sprengt wahrscheinlich die Kommentarfunktion. Besteht die Möglichkeit über Mail mit Dir Kontakt aufzunehmen?
Hi Thorsten,
wegen Typen wie Dir machen wir das hier!! Ich freue mich über Kontaktaufnahme. E-Mail-Adresse steht im Impressum.
Schauen wir mal, dass wir Deinen MattzoTrainController zum Laufen bekommen!
Bis bald!
Gruß,
Mattze
Hallo Mattze,
spitzen Projekt, dass du da auf die Beine gestellt hast!
Habe deine Servo- und Sensor Controller gleich mal in meine kleine 1:87 Car-Sytem Test-Anlage integriert. (Mit Hall-Sensoren statt Reed) Läuft wunderbar!
Mit dem Train-Controller habe ich leider das gleiche Problem wie Thorsten oben beschrieben hat, der Controller hängt sich kurz nach dem Start auf.
Gibt es dafür schon eine Lösung?
Gruß, Leo
Hi Leo,
freut mich! Der Bug im MTC4PF ist bestätigt. Ich arbeite dran und stelle bald ein Update bereit.
Gruß,
Mattze
Leo, probier bitte mal die aktuelle Firmware V0.2.1 aus. Ich glaube, Deinen Bug gefunden und beseitigt zu haben. Sonst bitte noch einmal melden! Danke!
Hi Mattze, vielen Dank für das schnelle Update! Version V0.2.1 mit einem L9110 funktioniert bei mir!
Super, freut mich!
Hallo Thorsten,
probier bitte mal die aktuelle Firmware V0.2.1 aus. Ich glaube, Deinen Bug gefunden und beseitigt zu haben. Sonst bitte noch einmal melden! Danke!
Hallo Mattze,
Top. Wie bei Leo funktioniert jetzt der Controller und dreht auch schon seine Runden auf der Testanlage.
Danke Dir!
Klasse, freue mich immer über Erfolgsberichte!
Hello Mattze,
Great job on all the automation projects, the look great!
I want to try out your software MattzoTrainController for Powered Up, but i am confused,I cannot find it on your site, or is it the same as published on this page (v0.2), which says for power functions?
http://mattzobricks.com/wp-content/uploads/2020/10/Firmware_MattzoController_V0.2.zip
Hope to used for my Lego garden train setup!
Greetings from the Netherlands,
Paul
Hi Paul,
thanks. The MattzoTrainController for Powered Up is in the last stages of development and will be published soon. I have a small number of features and improvements that I want to include into the Firmware.
Thanks for your patience.
Cheers,
Mattze
Hello Mattze,
Thanks for your responce, It explains why I could not find it.
Hope to see it soon released, I ‘m building a garden layout and want to have some powered up trains running on it next summer.
Keep up the good work,
Paul
Hallo Mattze
So wie ich das sehe schlägt deine Idee sehr grosse Wellen !! Ich bin auf jeden fall hell begeistert von deinen Umsetzungen ! Ich hoffe die Power Up Firmware ist bald erhältlich. Habe die Automatisierung mal in einem Chat hir bei mir in der Schweiz angesprochen. Alle wollten es !¨Bis jetzt kann ich nur sagen Hut ab. Das kommt super. Hab leider noch keine eigene Automatisierte Bahn. Aber deine Idee soll umgesetzt werden. Freue mich auf weitere Updates. Lg Stoffel
Hallo Daniel,
das freut mich! Viel Erfolg beim Basteln!
Ich bin doch sehr interessiert, diese tollen Ideen für mein Weihnachtslayout umzusetzen. Aktuell ist aber alles noch auf 9V und nicht automatisch. Ich frage mich nun ob es sinnvoller ist in die neue Powered Up Technik zu investieren oder noch versuchen die alten Power Functions Motoren zu bekommen. Hast du dazu eine Einschätzung?
Hallo Ulrich,
das ist eine gute Frage. Zunächst einmal würde ich nichts von Deinen 9V Sachen wegwerfen. Ich sehe da durchaus Chancen, dass es in diesem Bereich in den nächsten Jahren eine Renaissance geben könnte, auch im Bereich der Automatisierung. Bis dahin ist man aber auf Power on Board angewiesen (-> Batterien oder Akkus).
Ich selbst bin bzgl. der Technologie offen. Bei Powered Up muss man am wenigsten oder gar nicht löten, dafür einen großen Geldbeutel haben. Unsere Power Functions Lösung ist zwar grundsätzlich super, allerdings muss man einiges zusammenlöten und die ganzen Dinge auch im Zug unterbringen. Und 4DBrix Empfänger hat kaum jemand.
Ich würde empfehlen, mal mit der günstigen Power Functions Lösung anzufangen und da mal ein paar Controller zu bauen. Wenn Du damit klar kommst: alles gut. Sonst Powered Up machen. Wir werden das bald veröffentlichen, ich denke auch noch vor Weihnachten.
Demnächst wird es im Bereich der Zugsteuerungen noch ein paar heiße Neuigkeiten geben. Details darf ich aber leider noch nicht verraten.
Hello, great work here! I’m looking to train automation for the first time and I don’t have any component but I know I would like to eventually control my little train with MQTT. Would you recommend getting the Powered Up kit skipping over the older Power Functions? Thanks!
Depends a bit on your available time, knowledge and the space available in your loco. Maybe using the Powered Up solution would be a good start. I am going to release the firmware for the MattzoController for Powered Up soon. It’s definitely the easiest solution for unexperienced users.
Time is certainly an issue 😀 In terms of space my train suits the Power Functions components so it should be able to fit the Powered Up too. Do you know if it will be possible to communicate with your controller with tools like NodeRed with this new firmware?
The MattzoController firmware communicates with Rocrail via MQTT. Unless you hack yourself into the MQTT messages, you’d have to modify the firmware. But it’s open source, so feel free to try it.
Still sounds like a better long term solution. Thank you, looking forward for the new firmware!
Großartig!
Mir schwirrte die Steuerung per MQTT schon durch den Kopf, bevor ich mattzobricks entdeckte.
Die Umsetzung in der Firmware ist toll. Das Anfahren und Bremsen läßt sich super bewerkstelligen. Der Code ist so aufgeräumt und übersichtlich, dass es mir problemlos gelungen ist, ein anderes Treiberboard für den Motor (Pololu DRV8838) zu integrieren. Kleiner Tipp für alle: Die Bibliothek für den ESP8266 läßt auch die Konfiguration der Ausgänge mit den GPIO Nummern statt der symbolischen D0 …D8 zu. Die Symbole passen offensichtlich beim ESP8266 Wemos D1 nicht.
Grüße nach Hamburg
Hallo,
ich bastle auch gerade an einem NodeMCU ESP8266 mit L9110 rum, und ich bekomme aber nur Vollgas auf dem Motor. Egal in welche Richtung. Mit LEDs gegengecheckt… Entweder leuchtet sie oder garnicht. Sobald ich in Rocrail auf 1% gehe, ist die LED auf Vollgas an. Dann habe ich herrausgefunden, das PWM nur auf den Ports D2, D5, D6 und D8 verfügbar ist. Kein Problem, Motor (->L9110) an D5 und D6 und die Config geändert. Das gleiche. Nur Vollgas.
Was kann das sein, das ich hier kein PWM bekomme, sondern nur Vollgas?
Ich habe die Firmware MTC4PF V1.0.1 verwendet.
Guido