
MattzoControllers are the electronic components that help you to automate your LEGO train layout.
We have designed some standard builds for different types of MattzoControllers, and created instructions of how to build them.
Please understand that all information is provided “as is” without warranty. If you discover errors or problems, please let us know that we can improve the documentation.
Thanks and enjoy!
MattzoTrainControllers
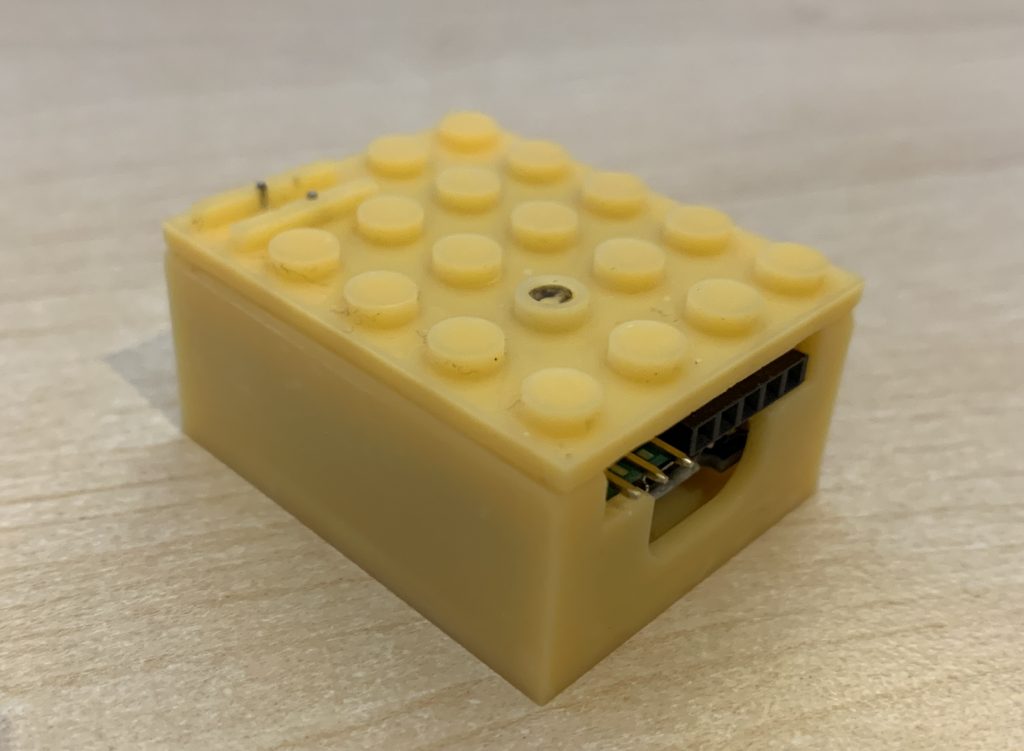
MattzoTrainControllers are used to power up your trains and move them along your layout. They also provide outputs for lights and other appliances.
MattzoLayoutControllers
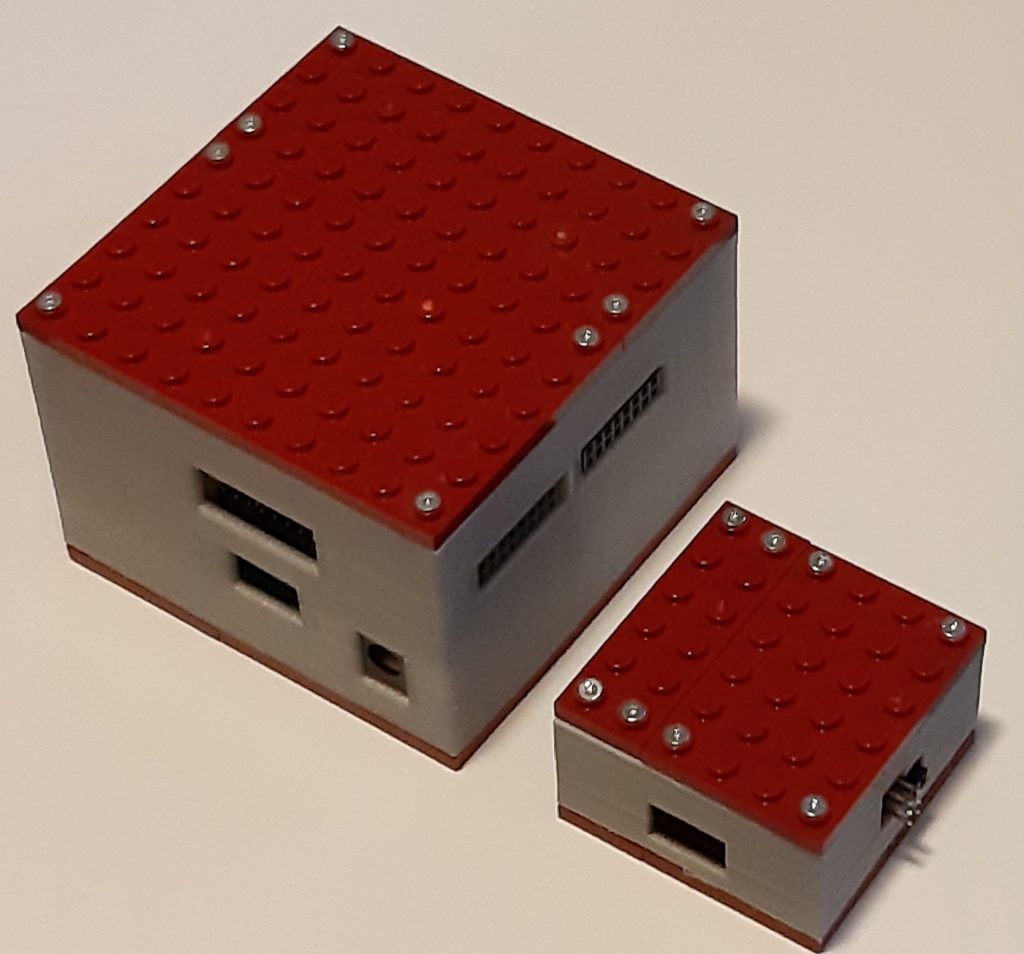
MattzoLayoutControllers are used to control everything that is landbased: switches, signals, sensors, level crossings, bascule bridges and turn tables:
OH I like the MLC mega! Is that going to be something we can purchase later?
The MLC mega is indeed an extremely powerful and versatile device. We don’t have plans to build and sell it to the public, but we try to publish the building instructions and anything else you need as good as possible in the future.
Will there be gerber file available for having the PCB manufactured?
Yes.
Excellent! for now I will to play with my breadboards…..
Hallo leider fehlt bei der PDF der Anhang bei der MTC4PF with battery
Ja, stimmt. Ich schaue mal…
very nice project, I was trying to do something similar using a ESP32 (wemos D1 mini version) but I was over doing it trying to squeeze too much into small case. I need to get more realistic I think, I was trying to get the wemos D1 mini with wemos motor driver board + DFPlayer sound moudle and an MPU 6050 gyro along with a dc to dc converter into a 6 x 4 by 5 high case 😉 going to ditch the MPU 6050 for now.
The biggest problem is since it is for a lego train it has to be very narrow and thus can’t have any connectors on the long sides due to the walls of the train. would be nice to have a couple of I2C connectors to add external sensors along with a serial port and general gpio/analog in ports.
If I make any progress I will post on here, it is all very interesting good fun.
Hi guys. Great Project. One question: when do you plan to publish the arduino code for the mlc mega? Thanks for all your effort!
Thanks. The MLC mega is actually nothing else than a special hardware configuration of the MLC. The firmware is already published. Just use the present version of the firmware in combination with the MLC mega example configuration, which is contained in the download.
We are going to publish the git repository soon. I will contain the firmware for MLC, MTC4PF and MTC4BT for usage with VSCode and PlatformIO.
Hello.
All MLC they have a standard ESP8266 ESP-12F board. Is ok if i use this (https://tanie-zakupy.pl/shield-esp8266-nodemcu-wifi-i-o-breakout-board,p,en,57384.html?category_id=3900) to power up the board?
It should work.
Hallo Matze,
Super das der MEGA jetzt gebaut werden kann!
Hast Du einen Tipp wo man die Boards günstig in Auftrag geben kann?
LG Andy
Wir haben die PCBs bei https://jlcpcb.com/ bestellt. Das hat gut geklappt. Ich mache bei Gelegenheit noch ein kleines Video dazu. Findet man dann auf dem Mattzobricks Youtube Channel.
Hi,
Many thanks for the good work that you share with us. I downloaded the zip file to produce my own MLC mega, unfortunately the gerber files are incomplete for both boards the bottom (GBL) layer and the PTH drill files are missing. Is there a way of getting the missing files or even the Eagle files?
Thanks for the heads-up, we’ll check it out.
Hello Matthias,
I’m trying to order the pcb’s, but it seems the drill layer is still missing in the recent Gerber-file downloads.
Thanks for checking,
Stefaan
Hi Peter and Stefan,
please try to order the PCBs at https://jlcpcb.com. Our PCB expert has ordered all of the PCBs there the we use in the Mattzobricks lab, and he said it worked without problems. Just leave all configuration options at default, this should do.
Hi, i got the same problem with the missing drilling layer. And i was ordering on https://jlcpcb.com. if i check the Gerber on a gerber viewer there is also no drilling layer.
Maybe there is a way to update the files?
Greetings Martin
Martin, thanks for the information. We are presently researching the problem.
Moin,
vielen Dank für deine Mühen und das coole Projekt.
Leider habe ich bei meinen 3D-Druck- und Anzeigeprogrammen einen Fehler im “Case Universal 8x4x4” für den MTC4PF.
Die Löcher für die Lego-Nuppsies sind irgendwie nicht richtig ausgeschnitten.
Viele Grüße
Micha
Danke für den Hinweis, schauen wir uns an.
Hallo Micha,
dieses Problem kenne ich, bei mir lag es an der untersten Ebene ich hatte mit Brim gedruckt und dadurch oder weil die untere Ebene zu flach eingestellt war. Ich weiß, dass es bei größerer Lücke zwischen Düse und Druckbett zu Problemen mit der Haftung kommt. Versuche es doch mal ohne Brim.
Ich habe mir letztendlich mit der Entgratung der Vertiefungen für de Noppen mit einem Cuttermesser geholfen. Trotzdem sitzen die Noppen ziemlich straff.
Gruß
Guido
Hallo Guido,
bisher bin ich leider noch nicht so weit gekommen, die Datei auszudrucken.
Der Fehler ist schon im STL vorhanden. Zumindest meckern Cura und andere Programme, wenn ich die Datei öffne.
Viele Grüße
Micha
Hallo, ich versuche bei JLCPCB.com zu bestellen aber mir fehlt die BOM Files und CPL, könntest du bitte diese auch freistellen oder es ist nicht möglich? LG Jurca
Für welchen Controller denn? Wir haben an den Gerber-Files lange nichts geändert, die müssten eigentlich alle in Ordnung sein. Schau bitte noch einmal, ob das Problem nicht vielleicht bei Dir liegen könnte. Danke!