
Forum Replies Created
-
AuthorPosts
-
Erik Swinkels
Participantupdate: No command is no problem. the PINREQ and PINRESP never stops until a command is send to the loco.
I tested the same board with the MLC software. This works without a problem. I can send switch commands over and over without any problem.
So what is going wrong.
The board is nothing special. board info when uploading a sketchSerial port COM4
Connecting….
Chip is ESP8266EX
Features: WiFi
Crystal is 26MHz
MAC: 94:b9:7e:14:8f:c2
Uploading stub…
Running stub…
Stub running…
Configuring flash size…
Auto-detected Flash size: 4MB
Erasing flash (this may take a while)…
Chip erase completed successfully in 7.0sParticipantfound other problems with this type of board:
Participantupdate:
I tested with a second board of the same type, same problem.
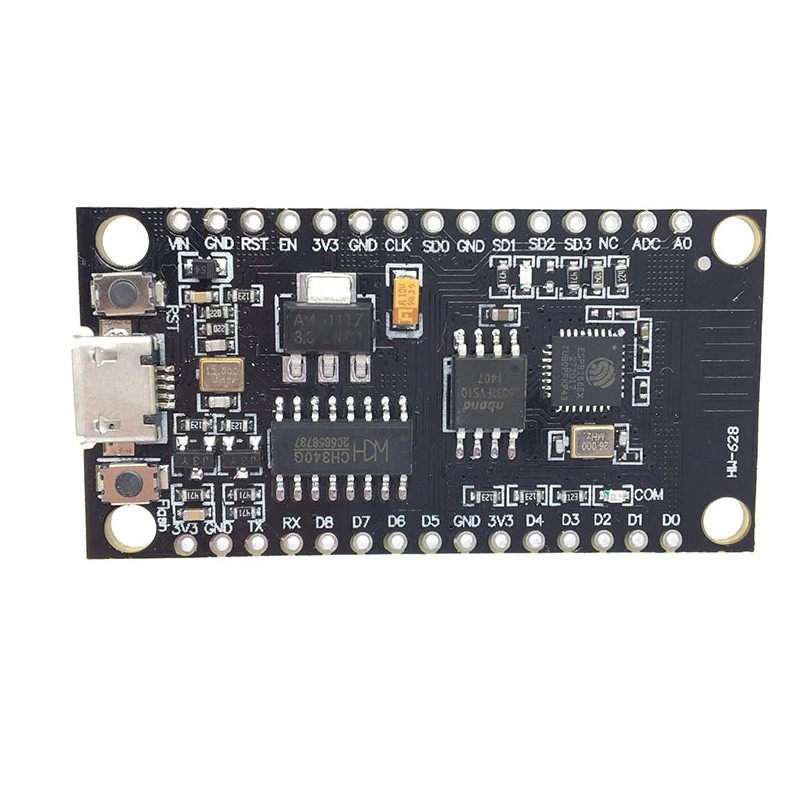
Than I tested with a complete other board… no problems…The not correctly working type is this one:”
https://www.bigtronica.com/5469-thickbox_default/wemos-nodemcu-lua-v3-340g.jpg
This is a board without the metal shielding… the one that does work has got the shielding.I used the board because it has no pins pre-soldered
My config is a slightly modified one from your examples.. but since it is working fine with the other board… It does not look like a problem with the config… but you’ll never know..
// Author: Dr. Matthias Runte
// Copyright 2020 by Dr. Matthias Runte
// License:
// Permission is hereby granted, free of charge, to any person obtaining a copy of this software and associated documentation files (the “Software”), to deal in the Software without restriction, including without limitation the rights to use, copy, modify, merge, publish, distribute, sublicense, and/or sell copies of the Software, and to permit persons to whom the Software is furnished to do so, subject to the following conditions:
// The above copyright notice and this permission notice shall be included in all copies or substantial portions of the Software.
// THE SOFTWARE IS PROVIDED “AS IS”, WITHOUT WARRANTY OF ANY KIND, EXPRESS OR IMPLIED, INCLUDING BUT NOT LIMITED TO THE WARRANTIES OF MERCHANTABILITY, FITNESS FOR A PARTICULAR PURPOSE AND NONINFRINGEMENT. IN NO EVENT SHALL THE AUTHORS OR COPYRIGHT HOLDERS BE LIABLE FOR ANY CLAIM, DAMAGES OR OTHER LIABILITY, WHETHER IN AN ACTION OF CONTRACT, TORT OR OTHERWISE, ARISING FROM, OUT OF OR IN CONNECTION WITH THE SOFTWARE OR THE USE OR OTHER DEALINGS IN THE SOFTWARE.// This file needs to stay in the folder of the firmware for the specific MattzoController!
// Handling of different configurations:
// It’s a good idea to create copies for all the controllers of this type that you own.
// Before compiling and uploading the firmware, just include the correct configuration into the firmware code.
// This allows to manage specific configurations for the different controllers easily.// Best practice:
// 1. Create a copy of this file if required (see above).
// 2. Go through the settings below and update the settings as required.// ***********
// MattzoLocos
// ***********// Number of locos (aka. MattzoLocos) controlled by this controller
const int NUM_LOCOS = 1;// List of MattzoLocos
// The parameters have the following meaning:
// – locoName: name of the loco as setup in Rocrail
// – locoAddress: address of the loco as setup in Rocrail
// – accelerationInterval: time interval for acceleration / braking (default: 100 ms)
// – accelerateStep: power increment for each acceleration step
// – brakeStep: : power decrement for each braking step
MattzoLocoConfiguration* getMattzoLocoConfiguration() {
static MattzoLocoConfiguration locoConf[NUM_LOCOS];locoConf[0] = (MattzoLocoConfiguration) {
.locoName = “GROENE”,
.locoAddress = 10010,
.accelerationInterval = 100,
.accelerateStep = 2,
.brakeStep = 2
};return locoConf;
}// *************
// Motor shields
// *************
// Motor shields are usually electronical components attached to the MattzoTrainController.
// They are controlled via PWM signals from the controller and handle the higher currents required
// for train motors.
// Beside those physically existing motor shields, they are also partly or completely virtual motor shields as:
// – LEGO_IR_8884, and
// – WIFI_TRAIN_RECEIVER_4DBRIX
// It is important to note that one train can have MULTIPLE motor shields attached to it. This is relevant for the following scenarios:
// – Infrared LED controls multiple motors in a single train
// – More than one 4DBrix WiFi Train Receiver installed in a single train.
// – Combining different motorshields into a single train is also possible (e.g. steam loco with 4DBrix receiver in the front
// and an additional “push” waggon in the middle of the train with an L9110 motorshield).// Number of motor shields controlled by this controller
const int NUM_MOTORSHIELDS = 1;// List of motor shields that are controlled by this controller
// The parameters have the following meaning:
// – motorShieldName: usually the same as the name of the loco. If the 4DBrix WiFi Train Receiver is used, you can choose a different name here. Useful if a train has multiple 4DBrix receivers on board and the motor turning direction is different.
// – motorShieldType: motor shield type
// – minArduinoPower: minimum power setting for Arduino based motor shields
// – maxArduinoPower: maximum power setting for Arduino based motor shields (max. 1023)
// – configMotorA: turning direction of motor A (1 = forward, -1 = backward, 0 = unused)
// – configMotorB: same for motor B
// – locoAddress: loco that this motor shields is attached to
MattzoMotorShieldConfiguration* getMattzoMotorShieldConfiguration() {
static MattzoMotorShieldConfiguration msConf[NUM_MOTORSHIELDS];msConf[0] = (MattzoMotorShieldConfiguration) {
.motorShieldName = “TGV1”,
.motorShieldType = MotorShieldType::L9110,
.minArduinoPower = MIN_ARDUINO_POWER,
.maxArduinoPower = MAX_ARDUINO_POWER,
.configMotorA = -1,
.configMotorB = 0,
.locoAddress = 10010
};return msConf;
}// ***************************
// Controller wiring specifics
// ***************************// Type of motor shield directly wired to the controller.
// (The different motor shield types are defined in MTC4PF.ino)
// Set to MotorShieldType::NONE if only virtual motor shields are used!
const MotorShieldType MOTORSHIELD_TYPE = MotorShieldType::L9110;// Constants for motor shield type L298N
#define enA D0 // PWM signal pin for motor A. Relevant for L298N only.
#define enB D1 // PWM signal pin for motor B. Relevant for L298N only.// Constants for motor shield type L298N and L9110
#define in1 D3 // pin for motor A direction control (forward).
#define in2 D4 // pin for motor A direction control (reverse).
#define in3 D5 // pin for motor B direction control (forward).
#define in4 D6 // pin for motor B direction control (reverse).// Constants for motorshield type Lego IR Receiver 8884
#define IR_LED_PIN D7 // pin on which the IR LED is installed.
#define IR_CHANNEL 0 // channel number selected on the Lego IR Receiver 8884. May be 0, 1, 2 or 3.
#define IR_PORT_RED 0 // Usage of red port on Lego IR Receiver 8884: 1 = motor, default rotation; 0 = no motor connected; -1 = motor, reversed rotation
#define IR_PORT_BLUE 0 // Usage of blue port on Lego IR Receiver 8884: 1 = motor, default rotation; 0 = no motor connected; -1 = motor, reversed rotation// NUM_FUNCTIONS represents the number of Rocrail functions that are defined for this controller
// If changed, the number of array values for FUNCTION_PIN below must be changed as well.
// You should also check void lightEvent(), which is responsible for switching headlights from white to red etc.
const int NUM_FUNCTIONS = 2;// Digital pins for function output
// For lights conntected to LEGO IR Receiver 8884, use virtual function pins IR_LIGHT_RED and IR_LIGHT_BLUE
uint8_t FUNCTION_PIN[NUM_FUNCTIONS] = {
D0, // white
D2 // red
};// PWM value for analog output pin if switched on
// max: 1023
// PWM values without resistors for bipolar Duo-LED from Tams Elektronik, ordered in January 2022:
// warm white:
// warm white: 992 (3,2 V)
// red: 620 (2,0 V)
// cold white:
// white: 961 (3,1 V)
// red: 651 (2,1 V)
// MTC4PF mini has 120 Ohm resistors inside, so no reduction is required effectively. Reduced red a bit for general care reasons.
int FUNCTION_PWM_VALUE[NUM_FUNCTIONS] = {
1023, // white
850 // red
};// The loco address for which the function pin will be triggered.
// You may fill that array up with zeros (0). Meaning: “all trains”. Makes only sense if this controller is handling a single train only.
int FUNCTION_PIN_LOCO_ADDRESS[NUM_FUNCTIONS] = { 0, 0 };// Automatic lights. If set to true, Functions with odd numbers (Fn1, Fn3…) are switch on when loco is going forward, and even numbers (Fn2, Fn4) when reverse. Set to false to disable the feature.
// To set-up more advanced behaviour, find the lightEvent() function in the MTC4PF code and change it as desired.
const bool AUTO_LIGHTS = true;// Digital output PIN to monitor controller operation (typically a LED)
bool STATUS_LED_PIN_INSTALLED = true; // set to false if no LED is installed
uint8_t STATUS_LED_PIN = D8;
bool STATUS_LED_REVERSE = false;// Report battery level
const bool REPORT_BATTERYLEVEL = false; // set to true or false to allow or omit battery level reports
const int SEND_BATTERYLEVEL_INTERVAL = 60000; // interval for sending battery level in milliseconds
const int BATTERY_PIN = A0;
const int VOLTAGE_MULTIPLIER = 20000 / 5000 – 1; // Rbottom = 5 kOhm; Rtop = 20 kOhm; => voltage split factor
const int MAX_AI_VOLTAGE = 5100; // maximum analog input voltage on pin A0. Usually 5000 = 5V = 5000mV. Can be slightly adapted to correct small deviations// ****************
// Network settings
// ****************// Trigger emergency brake upon disconnect
#define TRIGGER_EBREAK_UPON_DISCONNECT false// ***************
// Syslog settings
// ***************// Syslog application name
const char* SYSLOG_APP_NAME = “MTC4PF-TGV1”;ParticipantYou were completely right…. It was completely my mistake.
And for what it is worth.. Everything is working perfectly… (that is, my testbench)
Really great work!grt. Erik
ParticipantHi, build the switch controller and made it working in rocrail. Trying the MTC4PU but I keep getting compilation errors and am not able to compile.
Doe anyone know what I am missing…
the error:
MTC4PU:663:27: error: ‘ledColor’ was not declared in this scope
myHubs[i].setLedColor(ledColor, loco._locoAddress);
^
exit status 1
variable or field ‘setLedColor’ declared void -
AuthorPosts